In the course of combing through museum catalogues to learn more about life in late antique Egypt, I came across a few pairs of ornate leather shoes. This opened up a whole new research burrow to explore, and what I found inside did not disappoint!
I hadn’t done much with leather in over a decade, and I had never tried to make shoes. And so, driven largely by existential dread and the urge to learn skills potentially useful in an economic collapse, I decided to dive into some experiments in shoemaking.
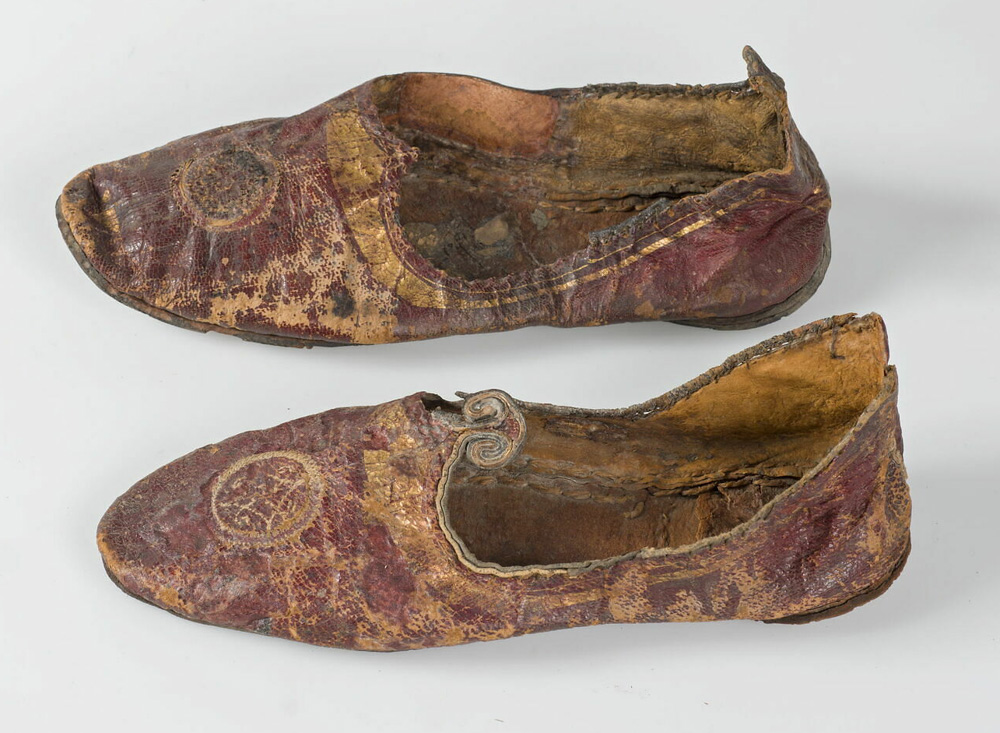
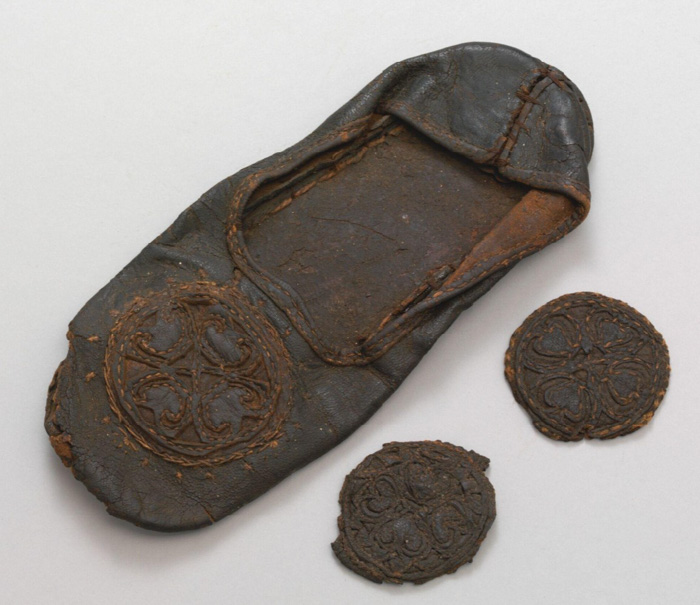
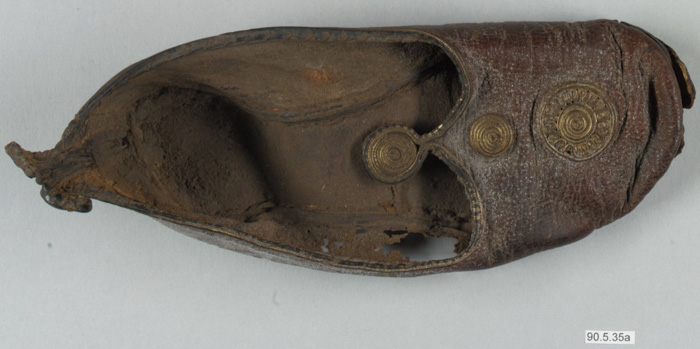
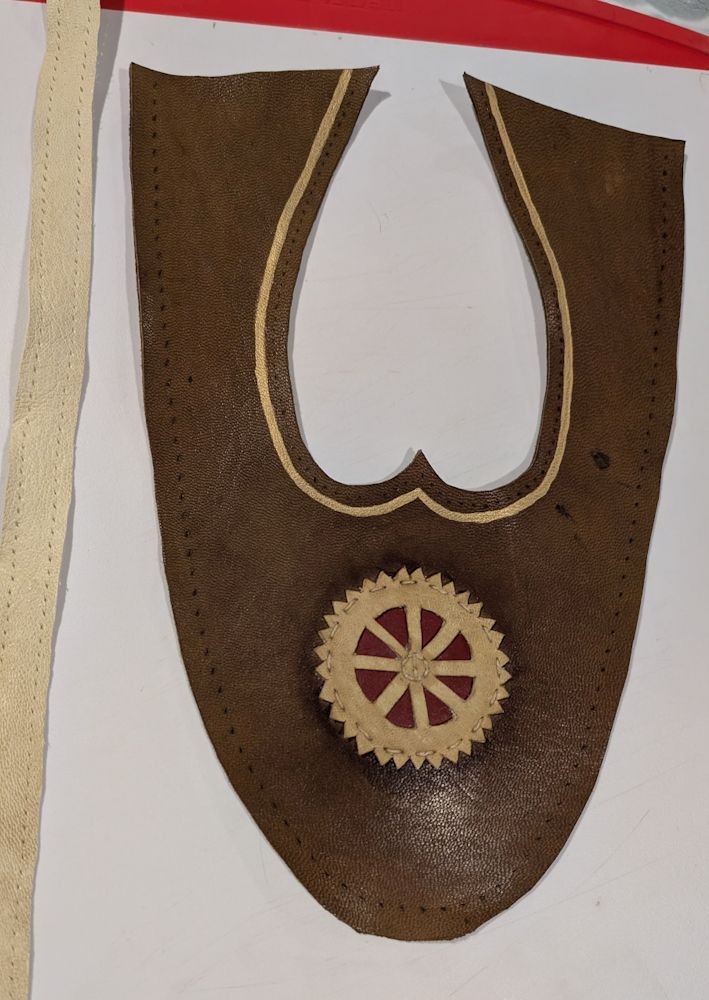
The inspiration for the first attempt is this pair of shoes:
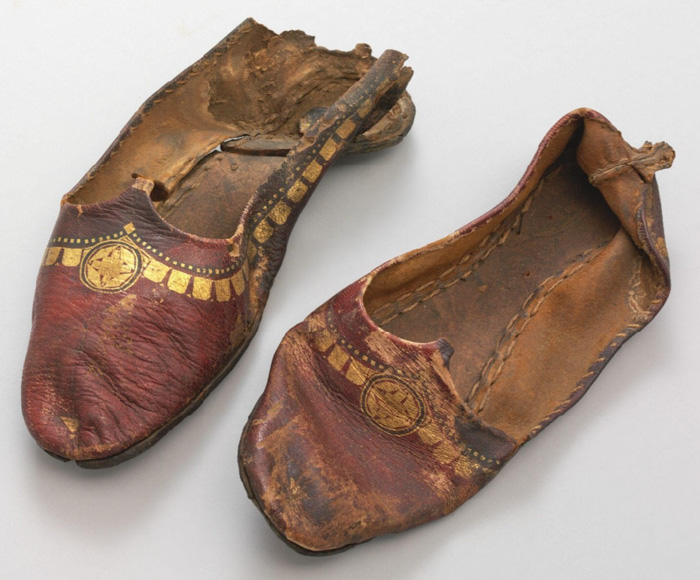
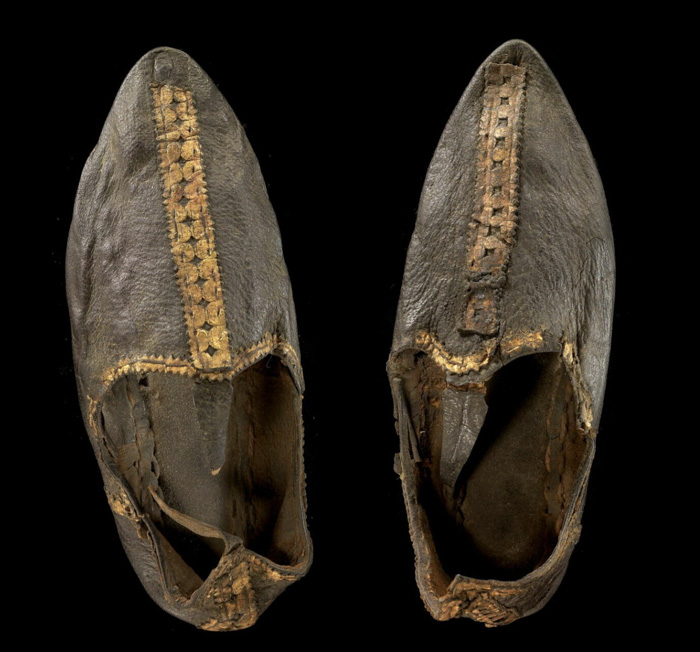
I also tried some elements from other shoes since I might as well learn as much as I can from these initial projects:
The materials, sewing techniques, and cutting pattern are based largely on the work of André Veldmeijer & Salima Ikram, and the following Open Access (available as PDF or free to read online) publications in particular:
- Veldmeijer, André J. & Salima Ikram. Catalogue of the Footwear in the Coptic Museum (Cairo). 2014.
- In particular, see Montembault’s Classe IV, Type B, Variants 2 & 3 (catalogue numbers 124-130) described on pages 81-84 with pictures and diagrams on pages 273-288.
- Veldmeijer, André J. Leatherwork from Elephantine (Aswan, Egypt). Analysis and Catalogue of the Ancient Egyptian & Persian Leather Finds. 2016.
- In particular, see catalogue numbers 46 (p.85-86) and 49 (p.91-92), as well as leather thickness measurements on items throughout the catalogue.
- Veldmeijer, André J. & Salima Ikram. Let a Cow-Skin Be Brought. Armour, Chariots and Other Leather Remains from Tutankhamun’s Tomb. 2024.
- Discusses archaeological methods of researching “leather” in addition to materials and methods used for preserving and using animal skins in pharaonic Egypt; also notes some of the techniques later introduced by Romans.
Sourcing Materials
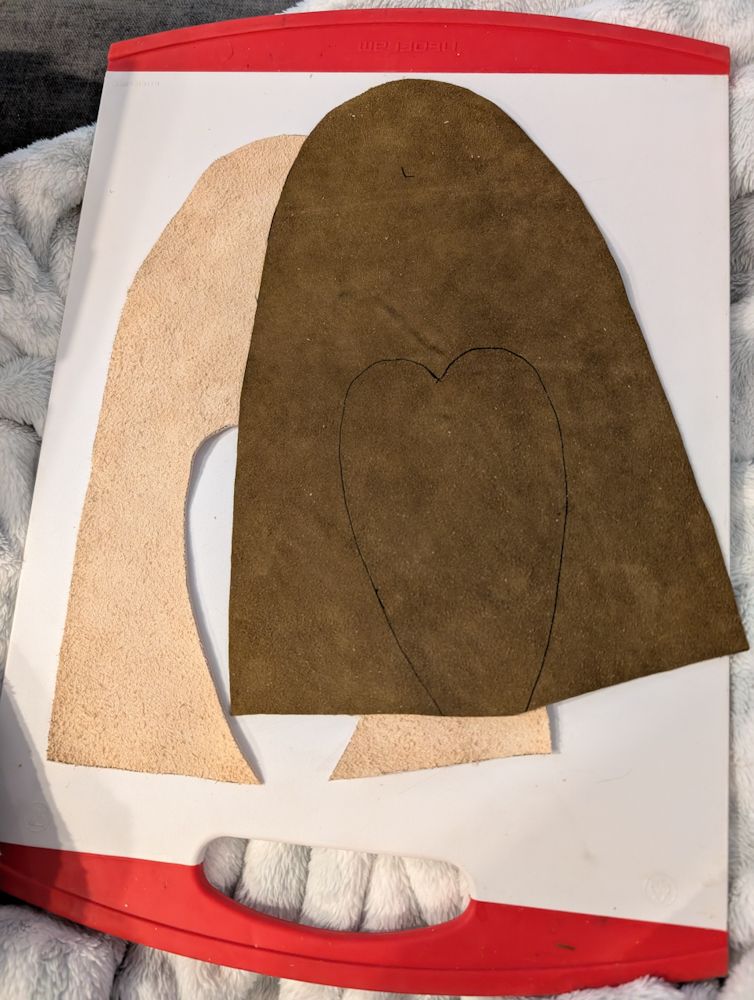
I located a tannery in my region that produces vegetable tanned leather and specializes in historical products like parchment: Pergamena. I ordered some goat hides and added a “grab bag” style purchase with a brief note about the project and color preferences. Well, it turns out Liv at Pergamena is just as much of a nerd about this stuff — after asking for more details about my project and diving into the reference material, Liv sent me a beautiful selection of goat, cow, and even hair sheep (!) leather to test out. That is exciting because goat, hair sheep, and Egyptian cattle are noted in Let a Cow Skin Be Brought to be the most common species used for leather in Pharaonic Egypt (Fig. 3.15 on p.41).
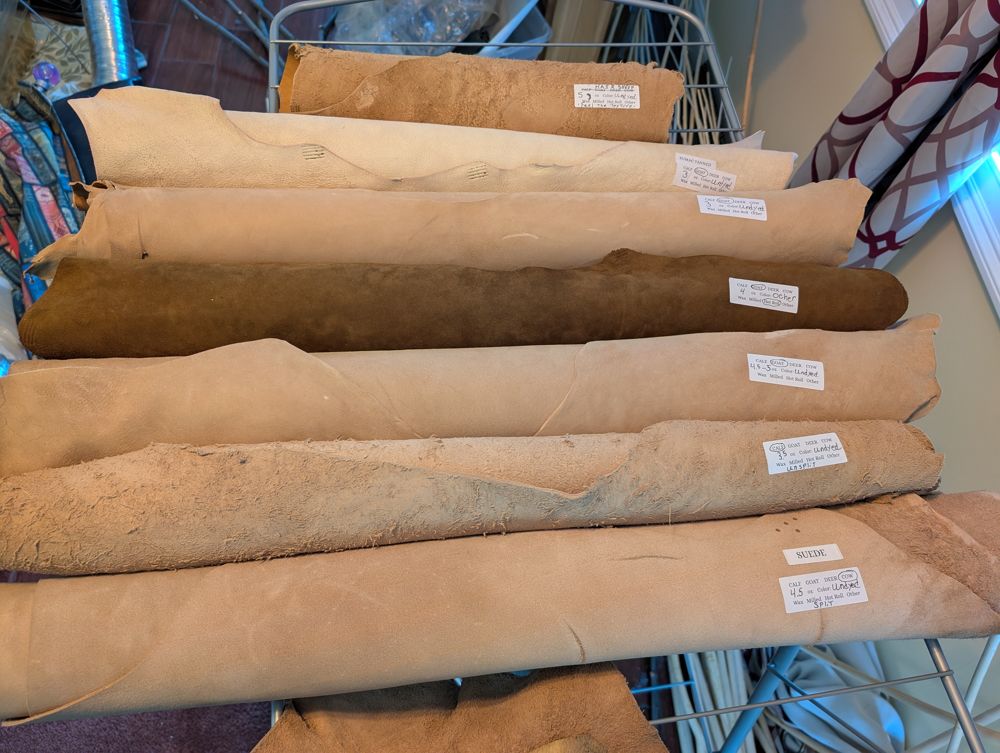
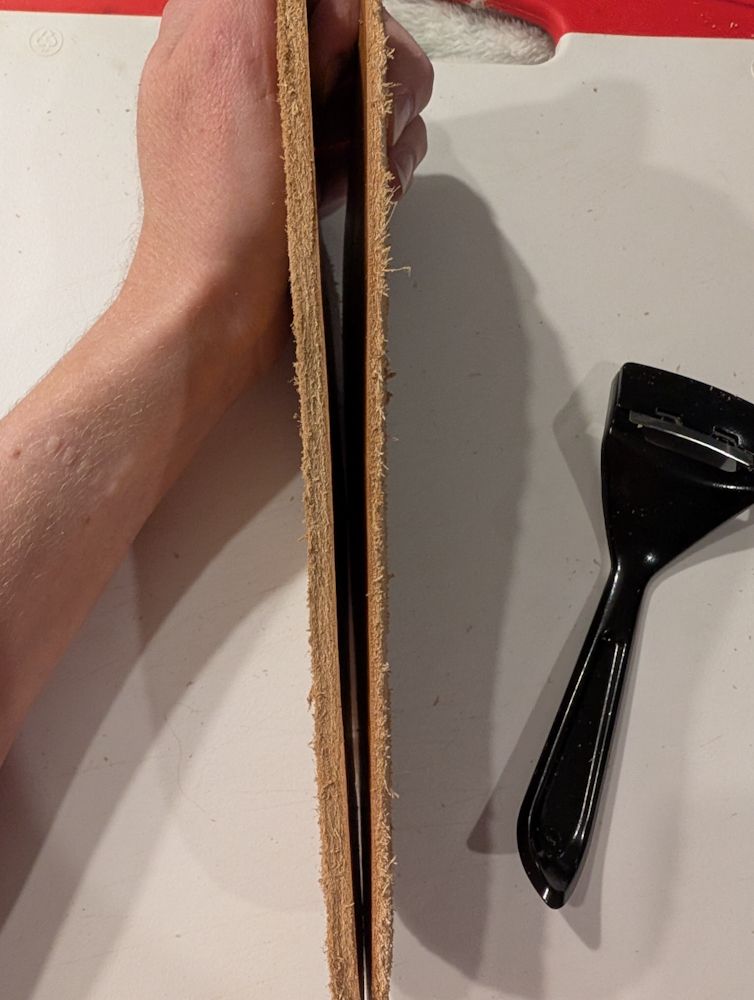
Most of these are undyed and have no finish applied, which is perfect for this purpose! However, for the first pair, I wanted to focus on figuring out the pattern and fit, so I chose the dyed ochre goat hide (darkest brown in the picture) as the base for the upper. For the sole, I am using a single layer of 5mm veg tanned cow cut from a piece that we had left over from an old project. I will experiment with multiple sole layers after tweaking the pattern for a good fit.
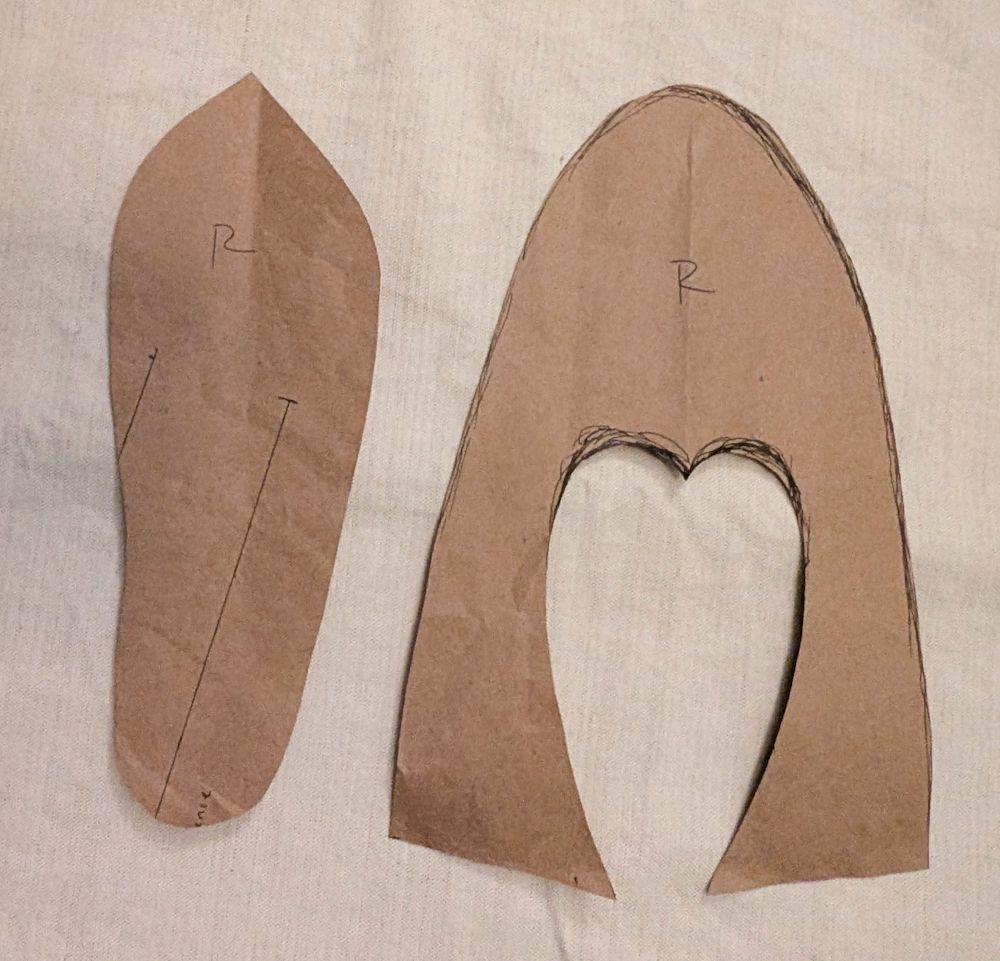
Patterning
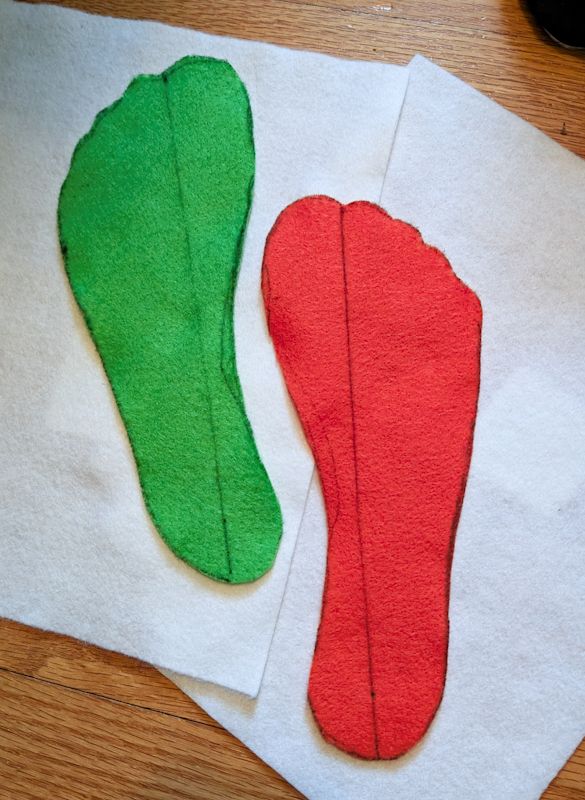
Making the sole pattern was pretty straightforward. I stood on sheets of colored felt and traced my feet so I could cut out those outlines. Then I used those felt templates as a basis for drawing a sole outline on heavy packing paper.
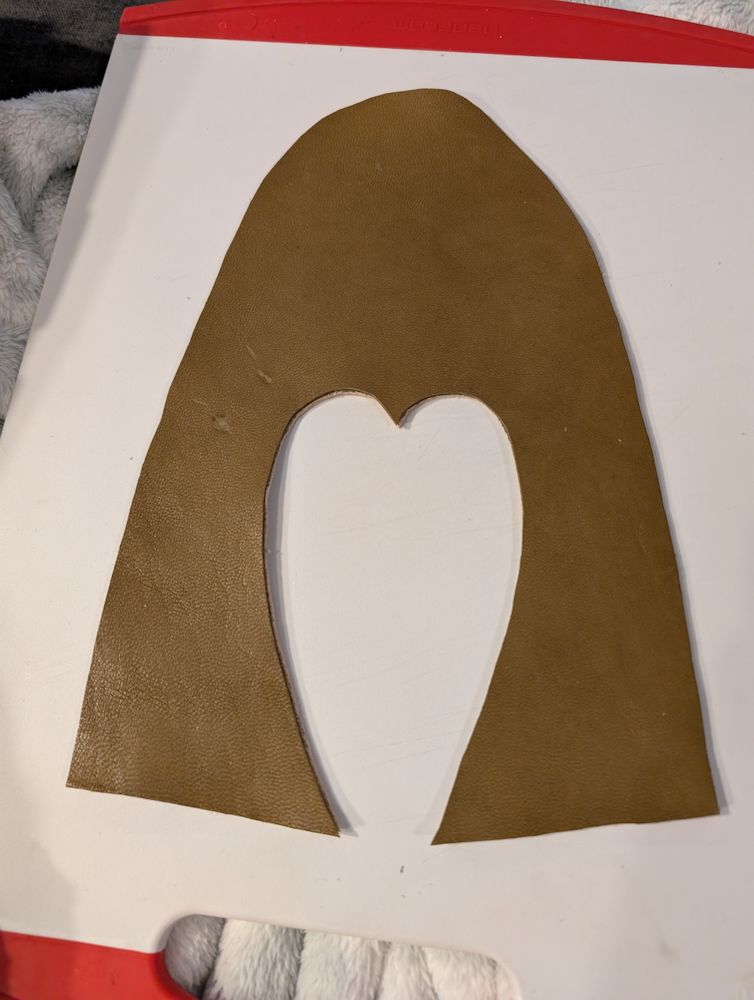
For the upper pattern, I cut a slit into a felt sheet and wrapped it around my foot and drawing the vague outline of the shape I wanted. It took a little more tweaking and smoothing of that piece to translate it to the paper, but I eventually got something workable.
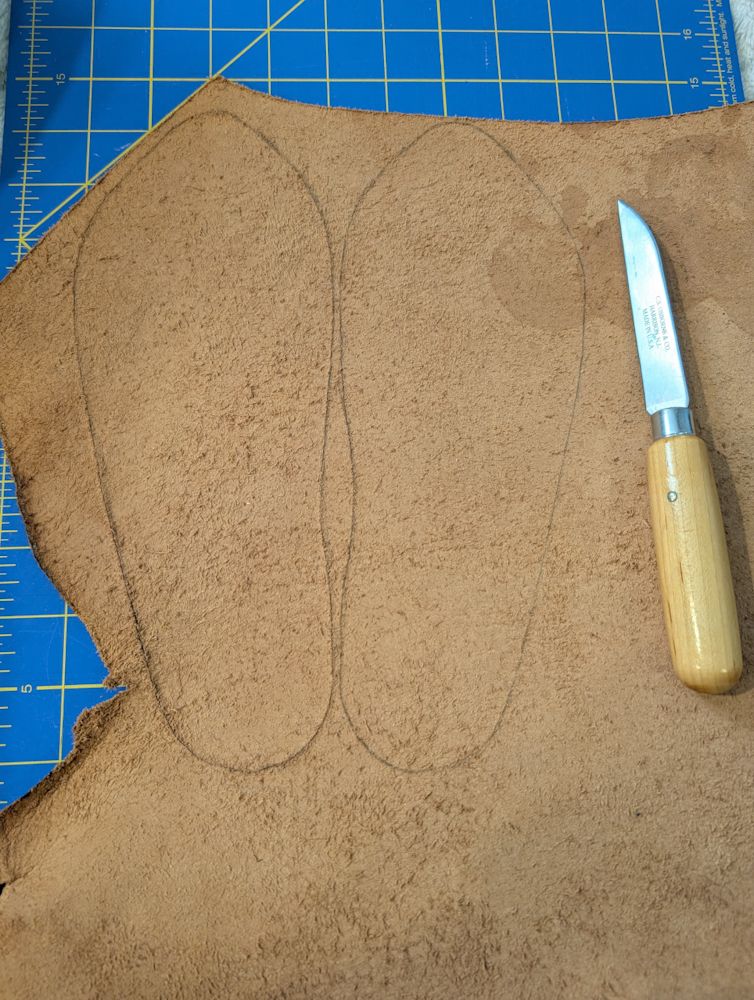
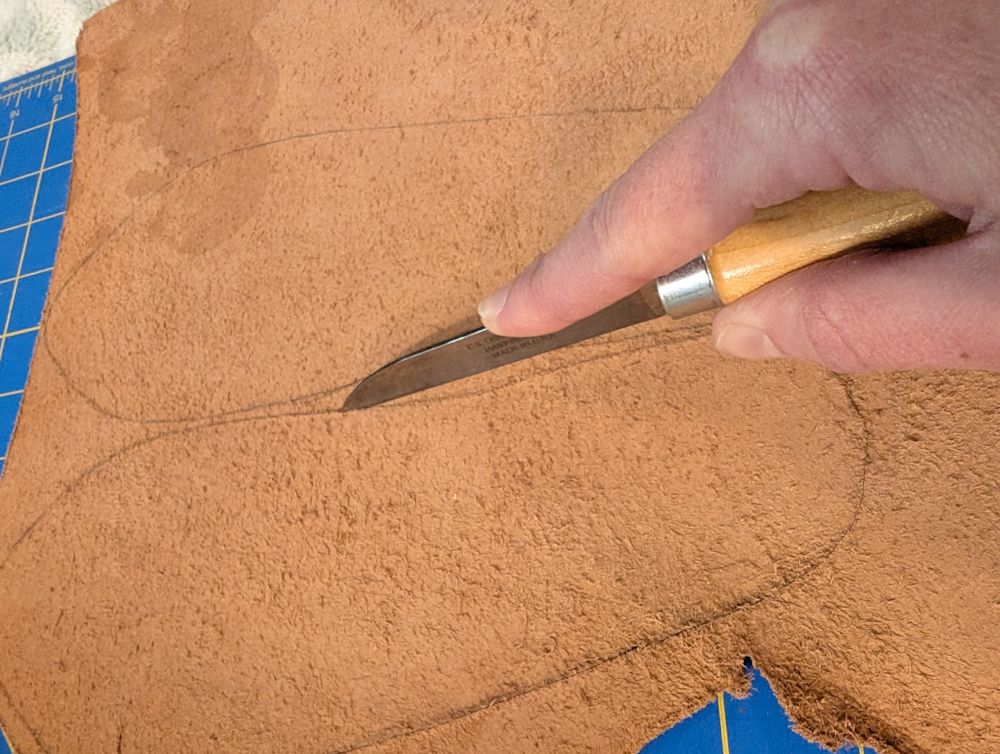
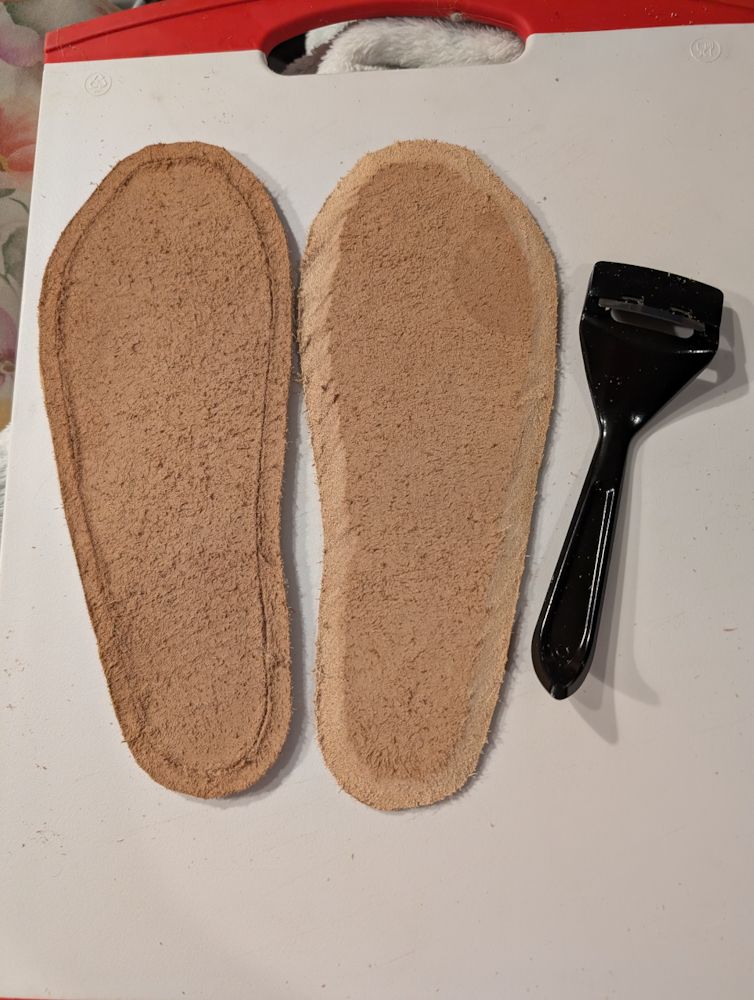
Cutting the Soles
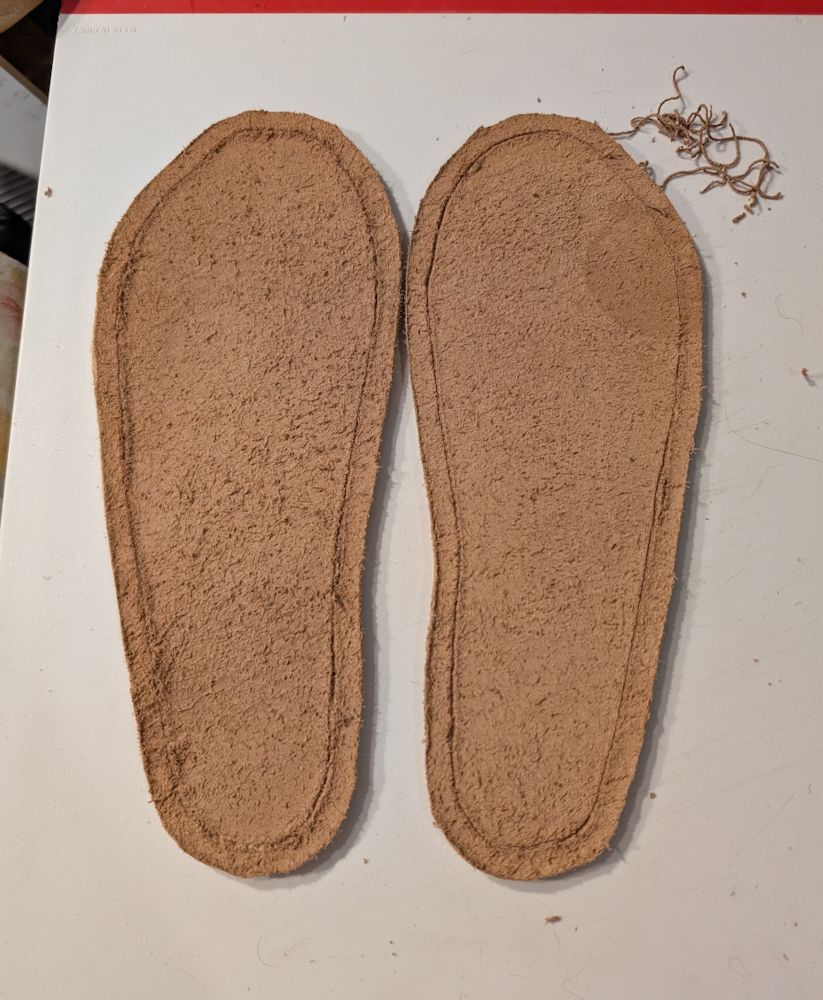
This was probably more difficult than it needed to be because I cut the soles out of dry leather. I now know that it would have been softer if I soaked it first. I also second-guessed my own pattern because I thought the soles looked too long, so I cut back the slight points at the toes to shorten them a bit. Spoilers: Don’t do that. My next pair of soles will be longer.
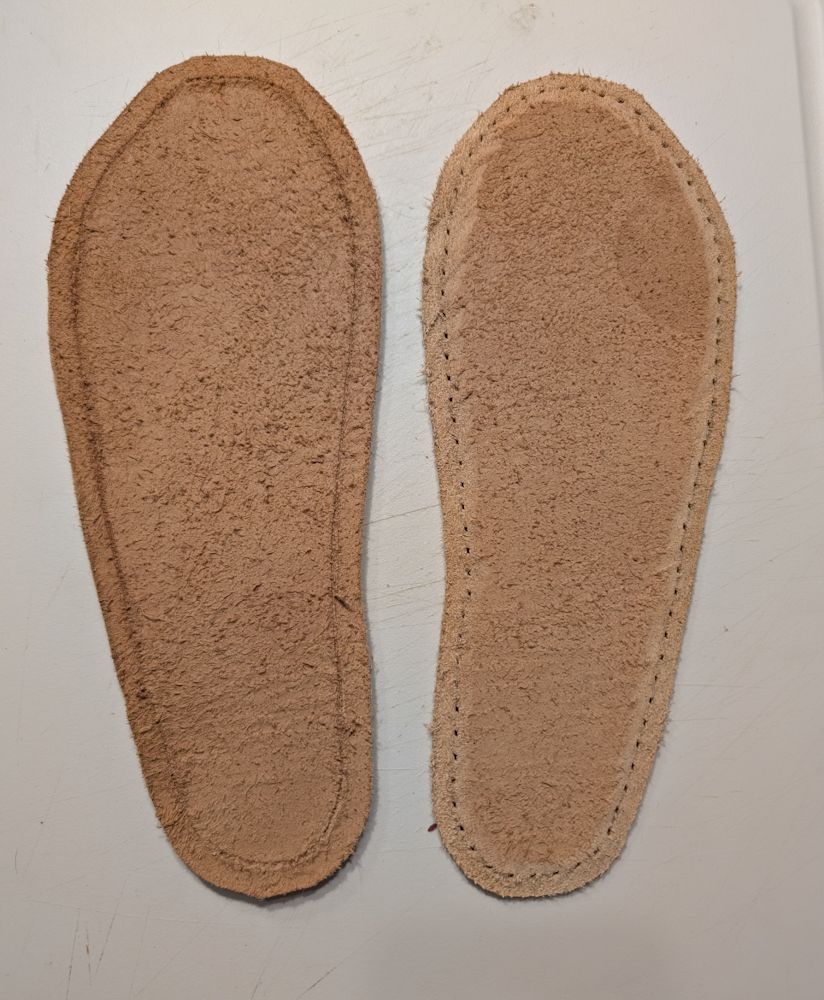
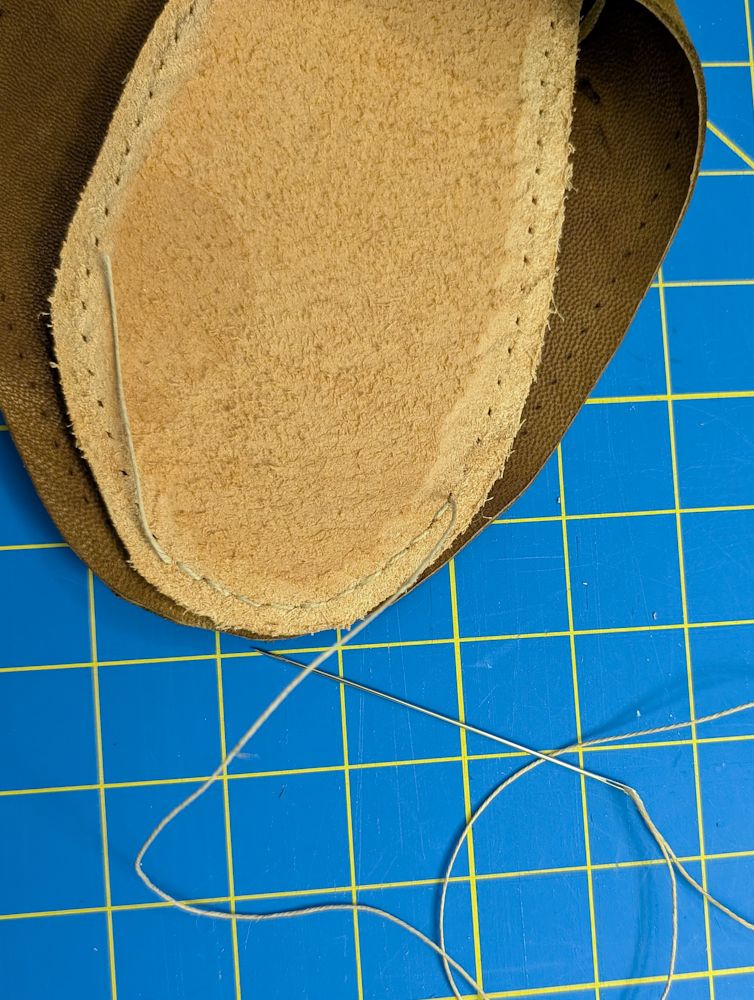
Assuming that the first pair would not really be wearable, I did the assembly of one shoe first so I could apply lessons learned to the second shoe. For this one, I thinned the edges of the sole and used a stitching chisel to make template holes from the flesh side through to the grain side. (For the second one, I am going to try keeping the full thickness edge and using an edge-flesh stitch instead.)

Preparing the Uppers
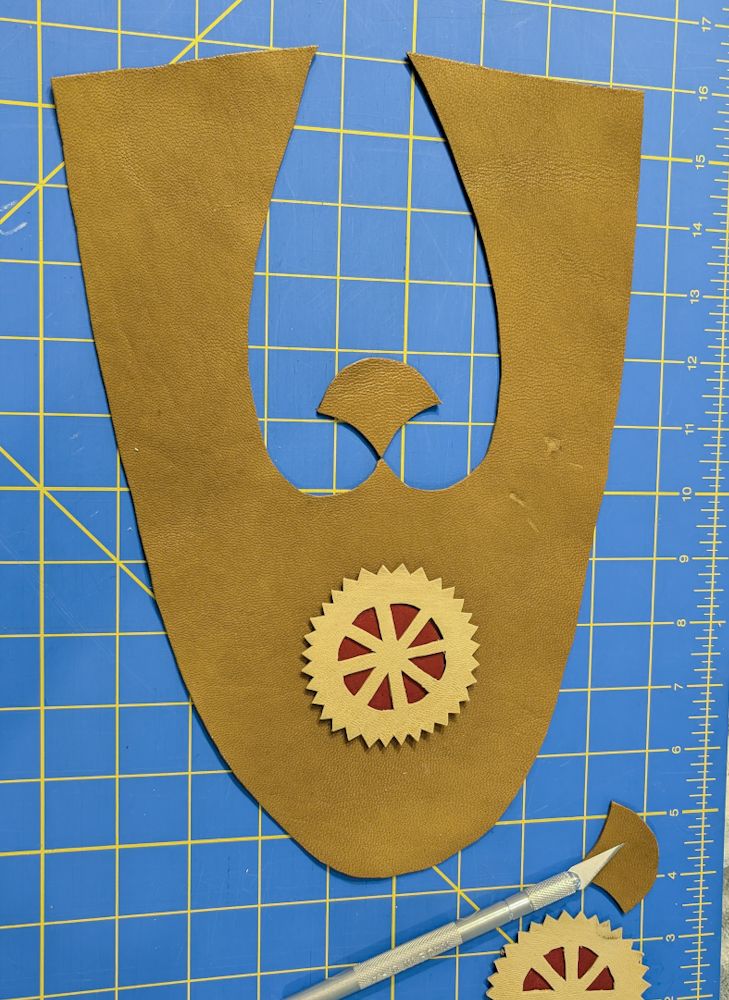
The main body of the upper part of the shoe is cut out of the leather in one piece. I used shears for this because they could handle this leather. I also cut a separate small tab to attach to the inner pointy part since some of the examples have separate pieces attached there.
Making The Details
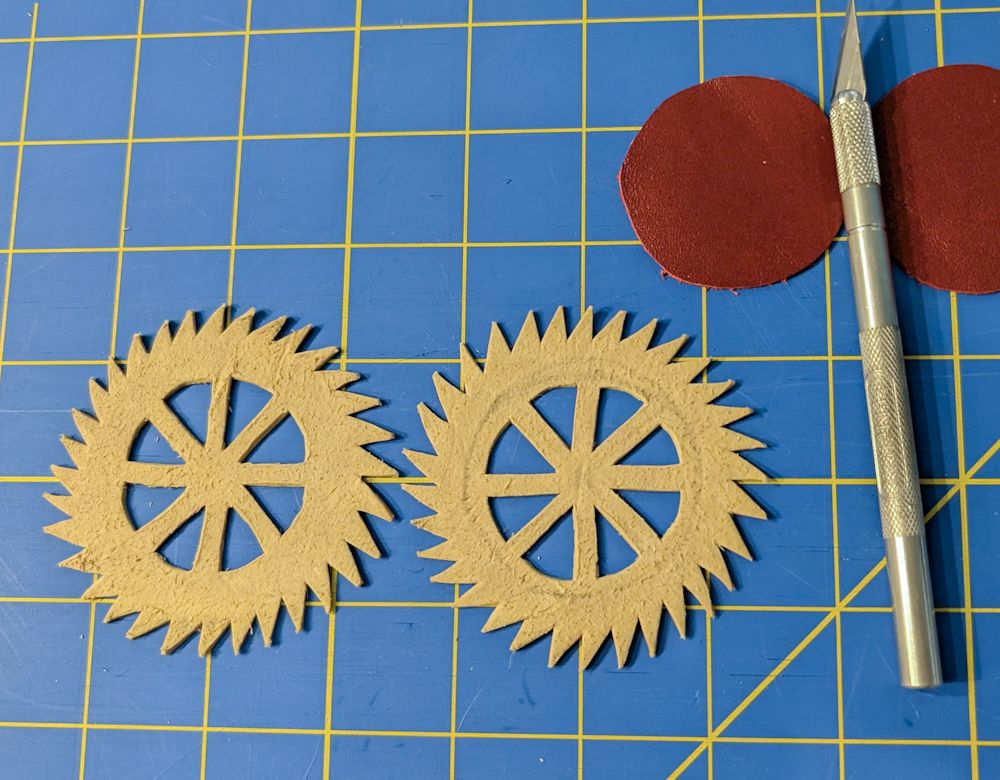
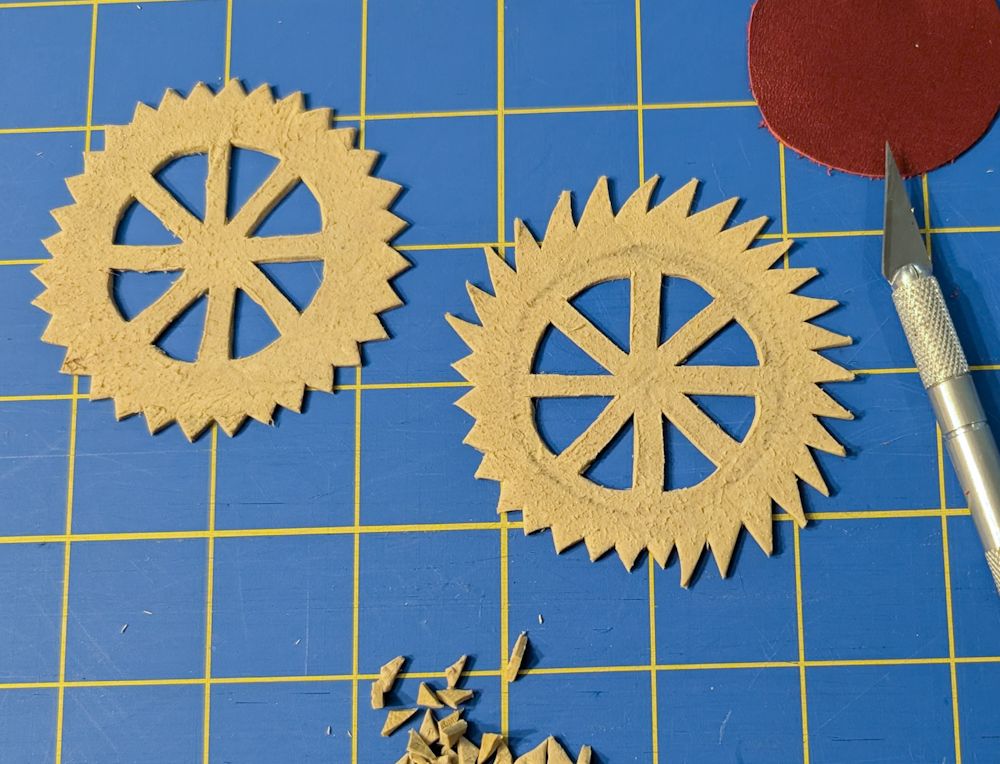
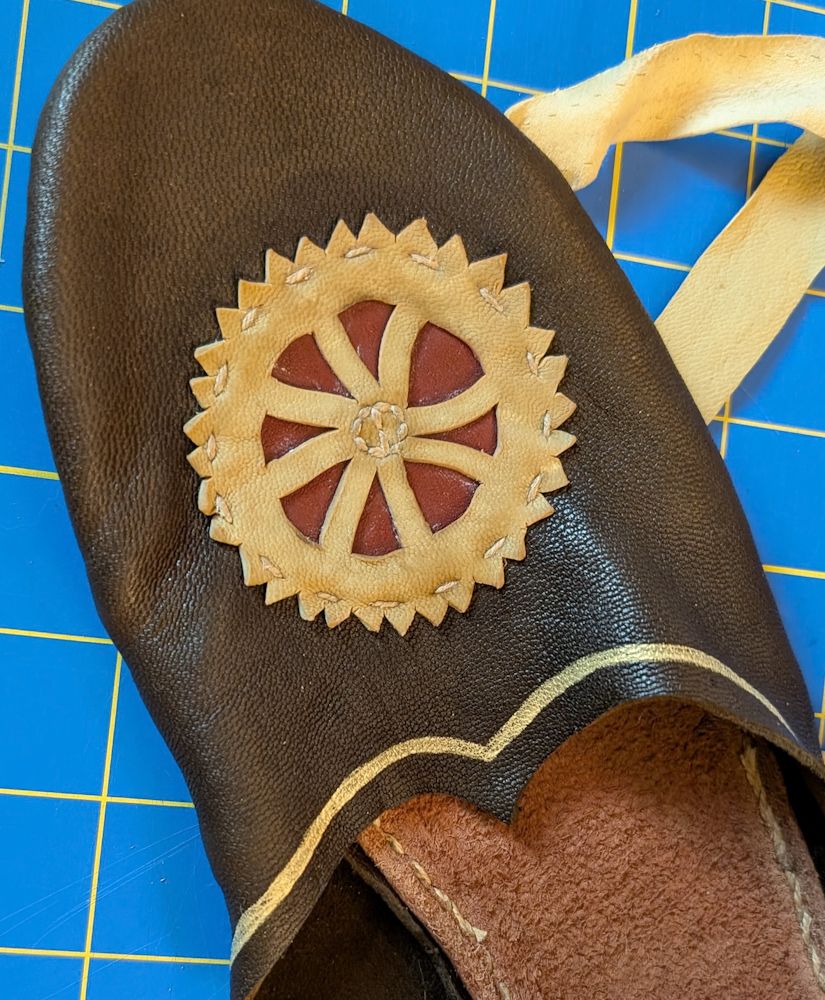
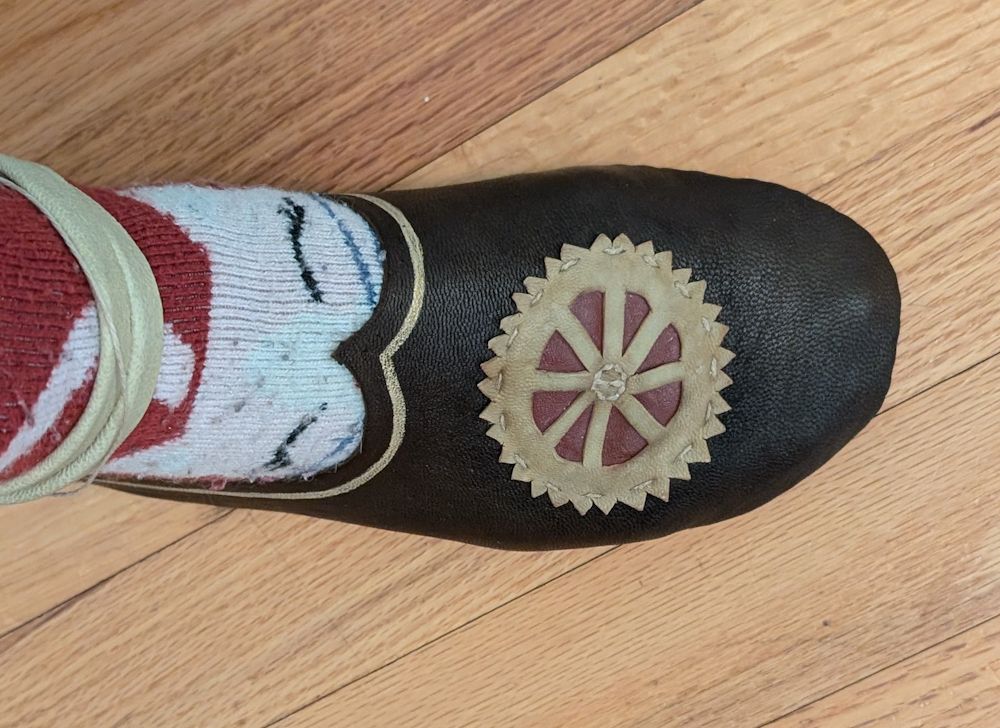
I wanted to try cut-outs and applique with zigzag edges, so I cut some small pieces of the sumac tanned goat leather into spiky wheels with a precision craft knife. I simply sketched the design on the back with a soft pencil and cut from that side, which worked great (see gallery below). The smaller red circles are just pieces of a chrome tanned cow lining leather. I attached them behind the cutouts in the wheel.
I also cut a few thin strips of the sumac tanned goat to use for binding the top edges of the shoe, which is pictured later.

Assembly
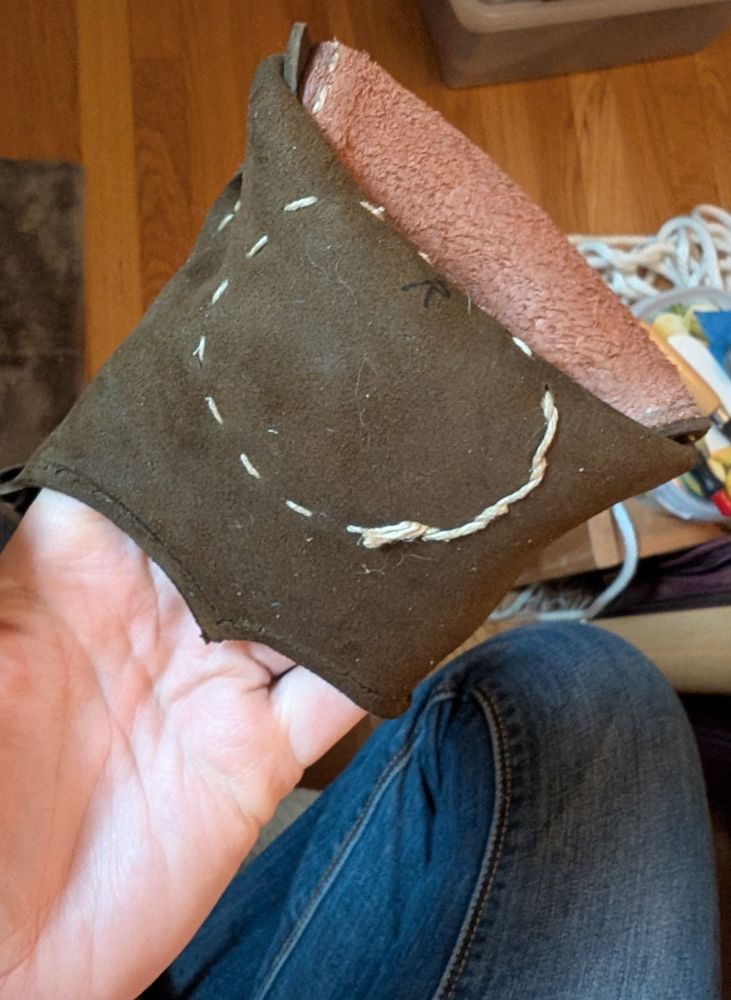
I used line linen from my weaving stash with beeswax applied for all of the stitching on this shoe. I sewed the applique onto the upper with a circle of running stitches before sewing the upper to the sole. (The discoloration in the picture is due to a mishap that required immediate cleaning.) I also painted a gold line around the top edge using acrylic paint rather than gold foil because there is no way I’m wasting money on real gold just to embed into shoes in this economy!
Since I wasn’t sure about fit, I did not sew the binding onto the top edge or sew the back together at this time. I will do that for the second shoe and see how it compares.
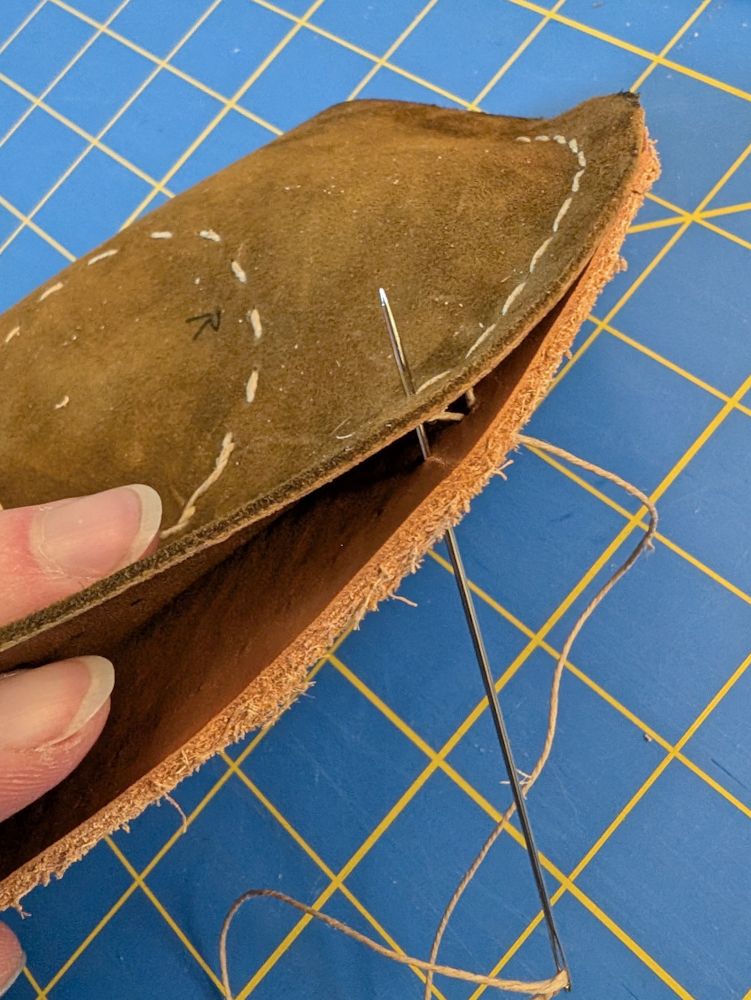
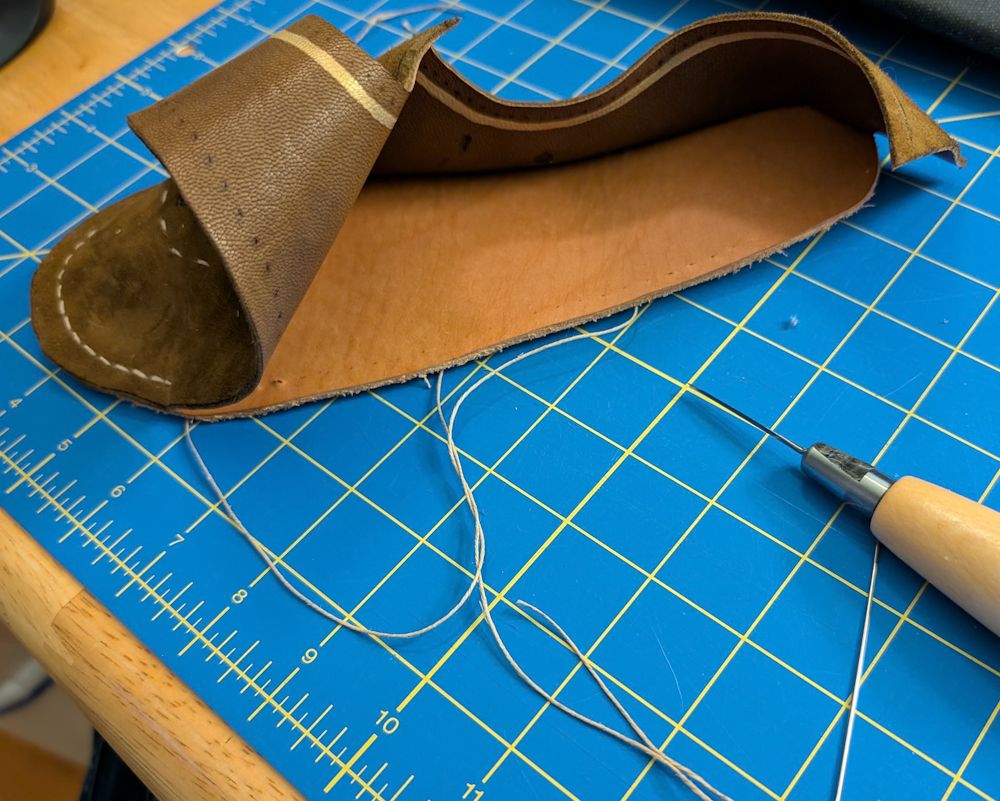
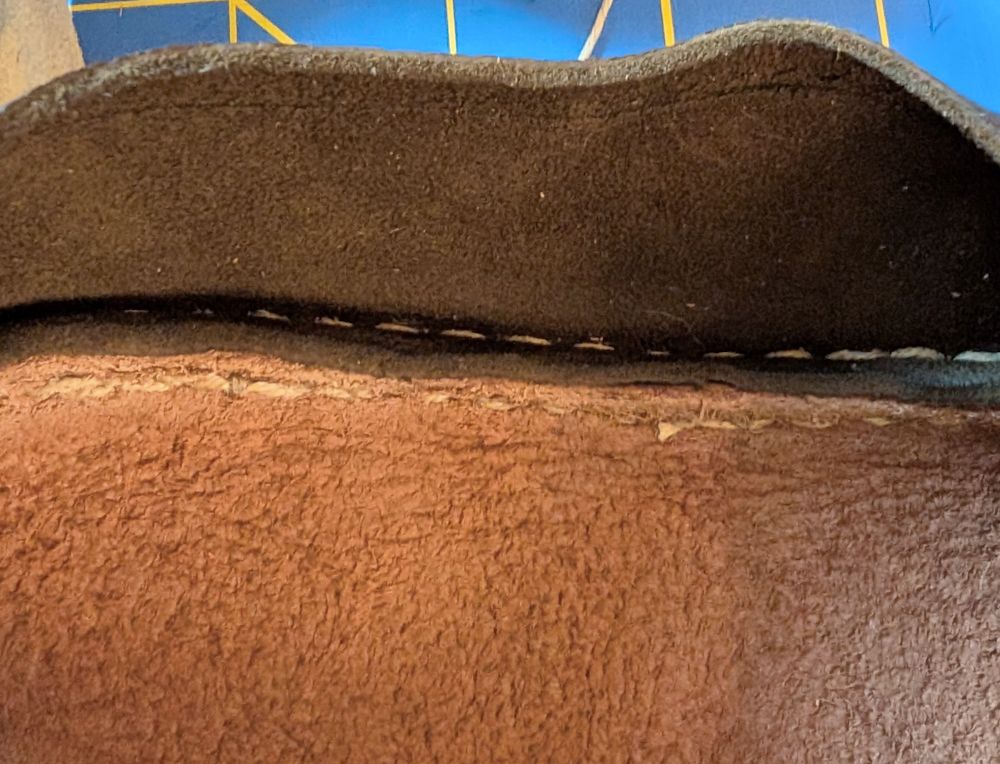
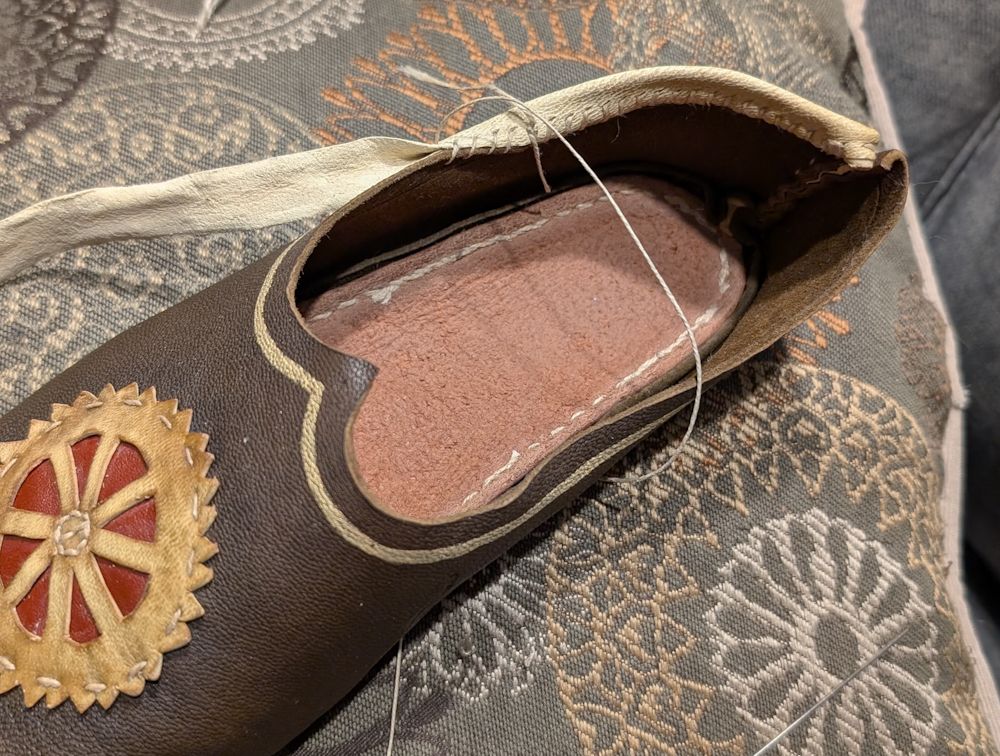
When sewing the upper to the sole, I used a diamond awl to increase the upcoming chisel holes to a larger size right before stitching that line. The two catalogues referenced above give diagrams of construction details, so I had several options for this stitch. I chose to use a single needle stitch that looks similar to a two-needle double running stitch (often called “saddle stitch” now), but if you look closely you can see that it results in offset holes and stitches. Why did I choose that stitch? Pure curiosity — I have never seen it used before and wanted to find out how it would act. The gallery below is a photo montage of the sewing process.
After the upper was attached to the sole, I trimmed the extra length off the back and sewed up the back sides with one end of the edge binding in between as piping. I decided to wait until after turning the shoe to stitch the rest of the edge binding on, as I wasn’t sure if it would make the turning more difficult.
Turning
Now, at last, I finally soaked the sole! And the rest of the leather, since it’s pretty hard to only wet the sole when it’s attached to the upper. After the sole was thoroughly squashy, I limbered up my hands and started negotiating with the shoe.
The way that worked for me was to push the toe in on itself and just keep wiggling each side a little further in until it started to look like a platypus might be trying to come out the other side. Then I flipped the heel around and just shoved the rest of the sole down through the middle of the shoe.
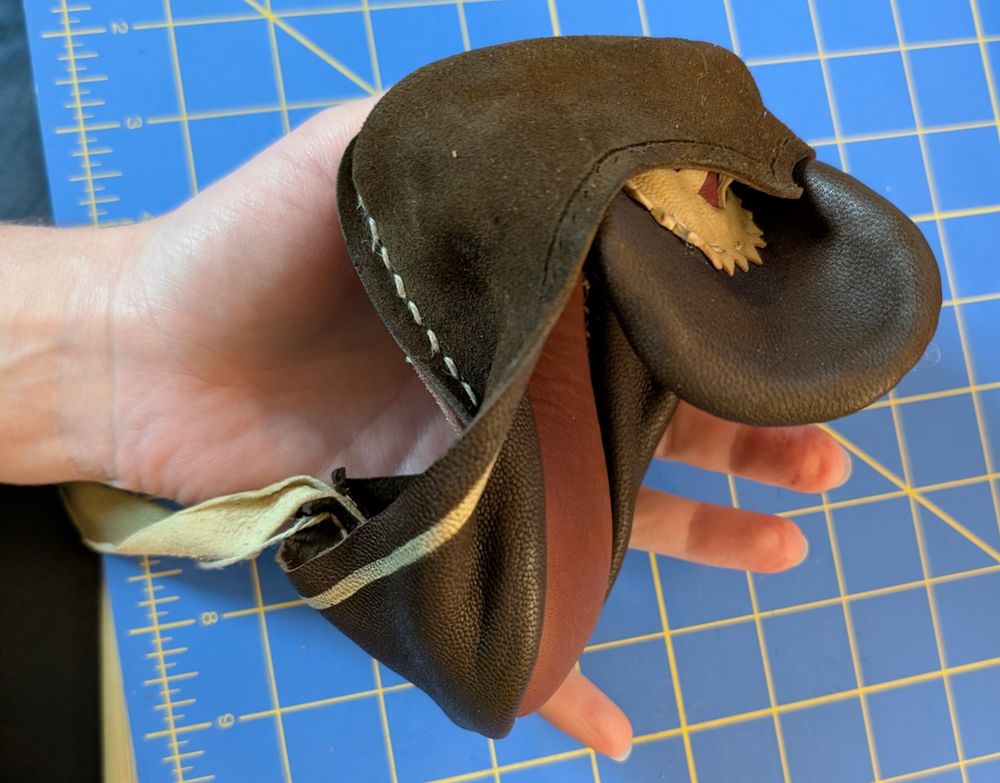
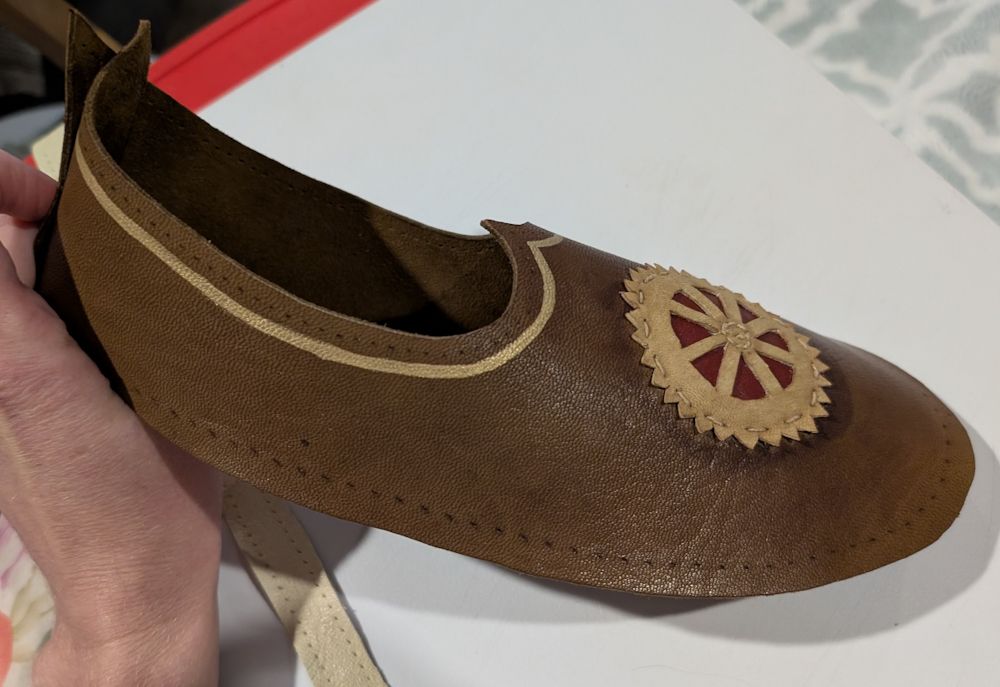
The applique, especially the red circle behind the wheel cutout, got a little rumpled because it is only attached at the center. I just used my fingers and a stylus to smooth it back out.
And do you know what I did next, dear reader?
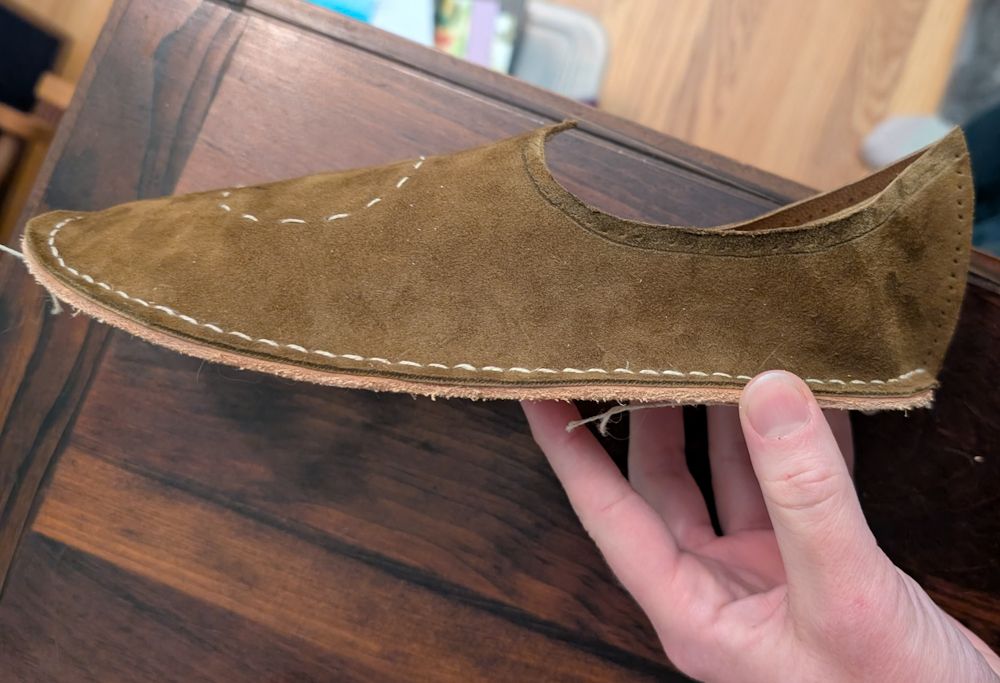
I jammed my foot right inside and did a whole lot of bending and wiggling and walking around the house to get that leather to conform to my foot. This is the part when I realized cutting the toes of the soles shorter was a mistake. Oh well, it’s a learning experience.
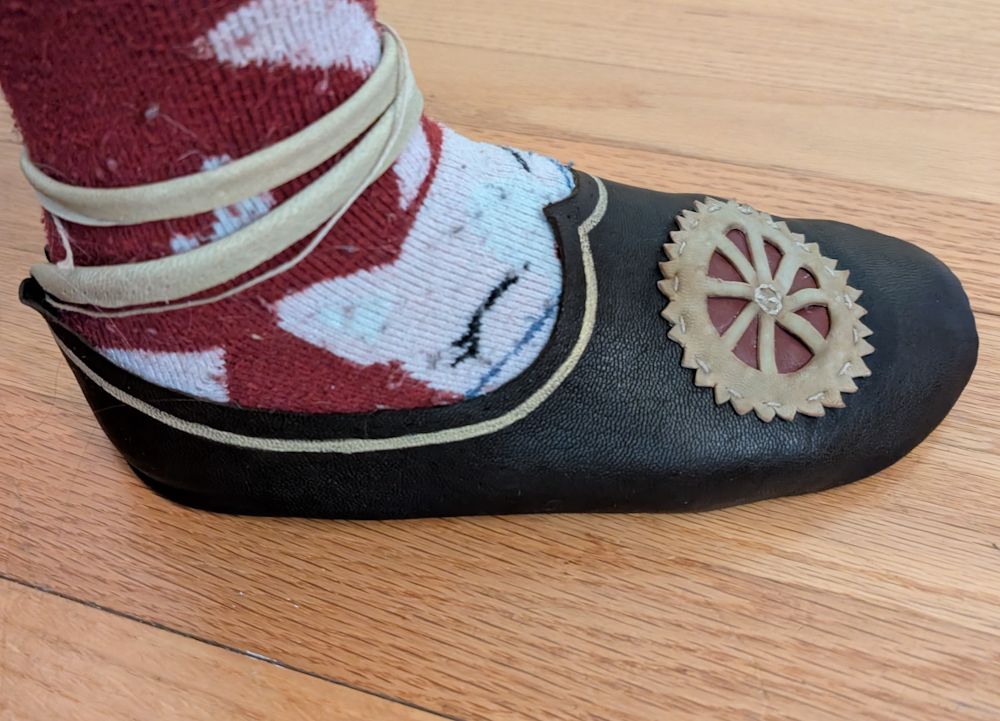
Because the sole is too short, my heel sticks out past the back. That results in the whole back of the shoe being pulled lower than it is supposed to be. I can make some adjustments to how I assemble the second shoe that will help mitigate this somewhat, but the soles will just need to be cut longer on the next pair to make sure they are wearable.
Finishing
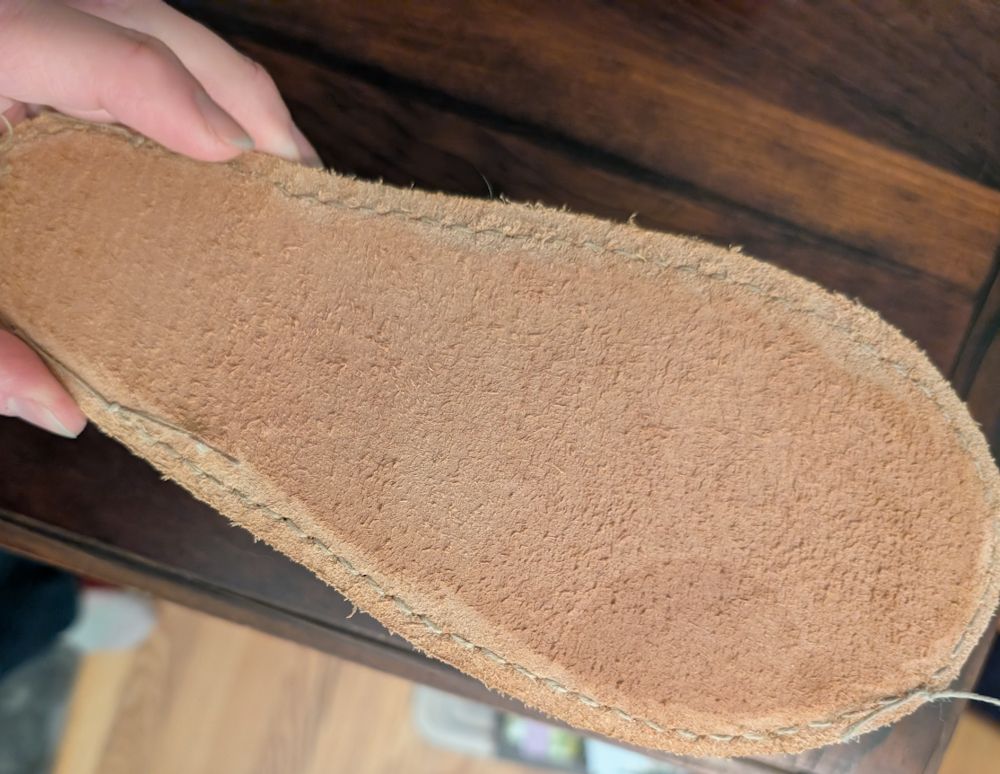
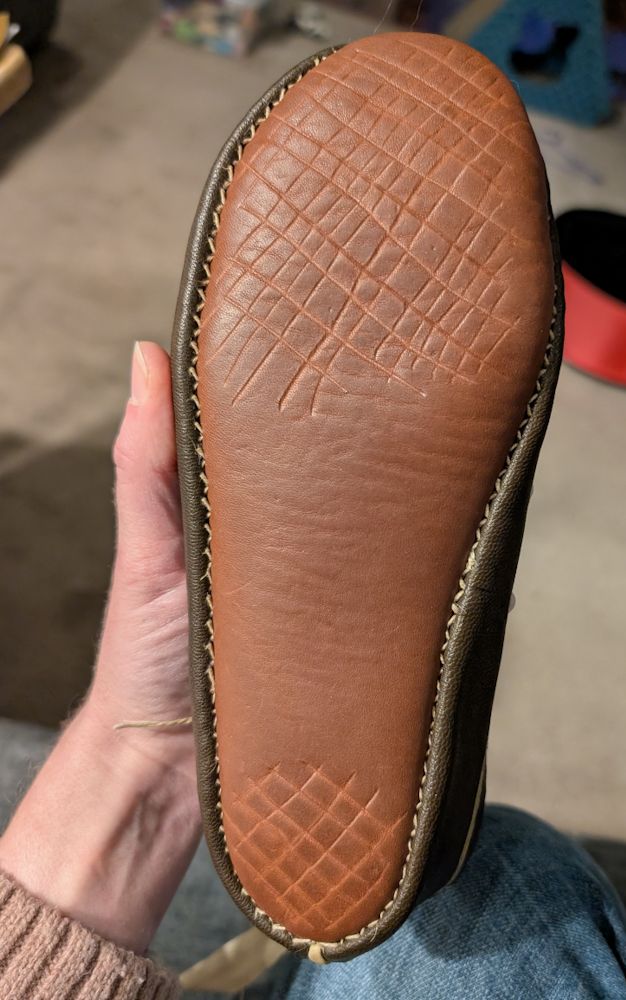
I used a rounded jewelry hammer to hammer the seams against a river pebble held inside the shoe. (I needed to use something, and the rock was free. It was annoying, but it worked.) I scored some lines in the bottom of the sole with a stylus just for the hell of it. They aren’t incised, so they won’t stay very deep, but it’s better than a totally smooth bottom.
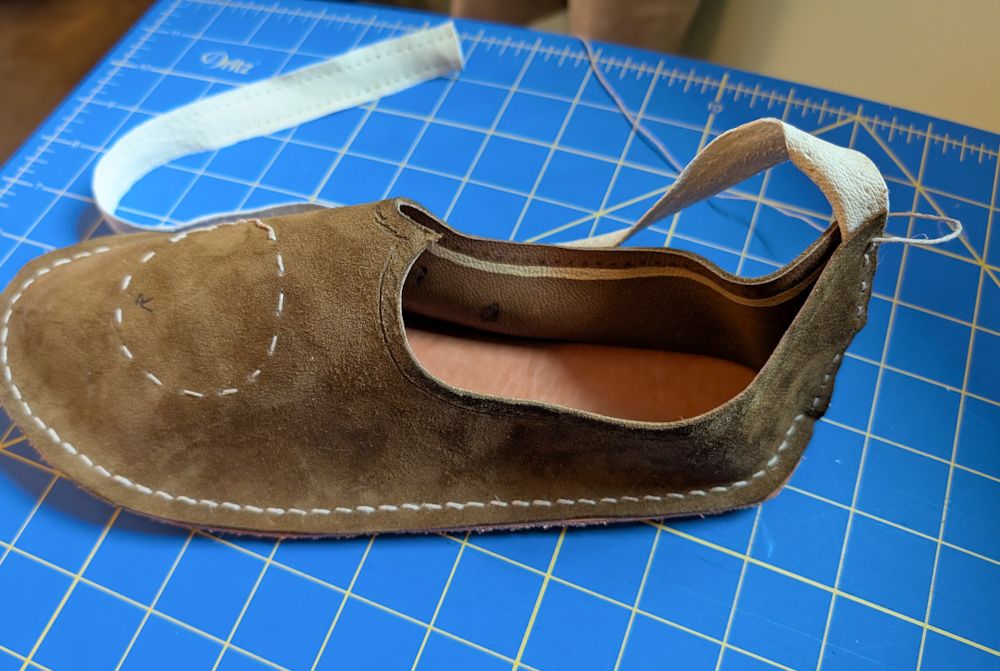
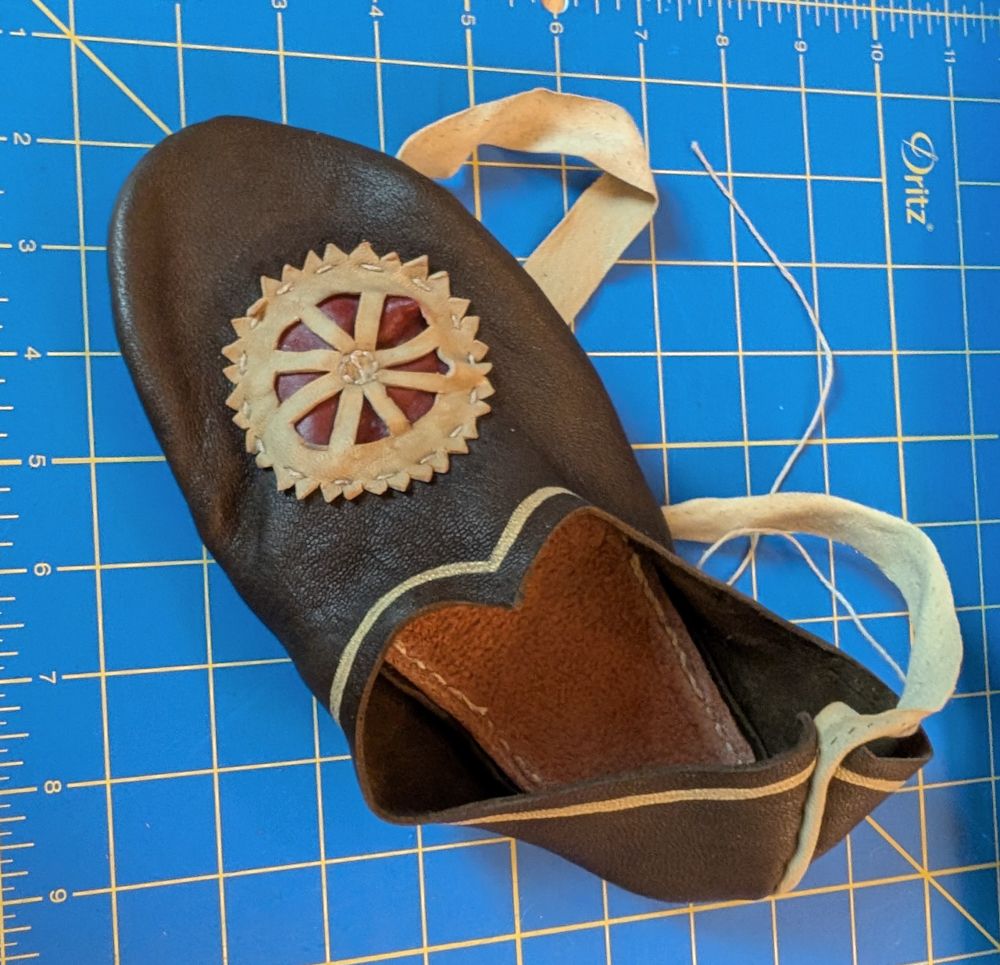
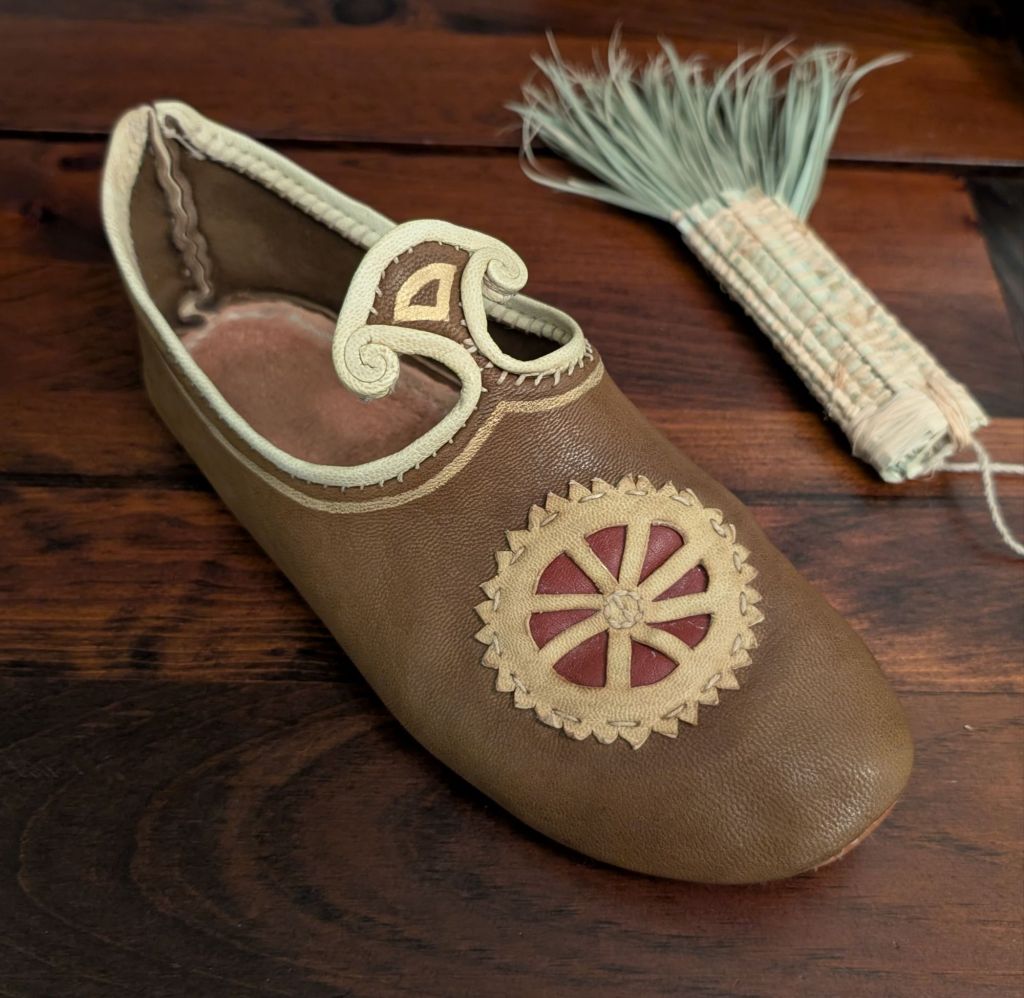
Lastly I sewed the edge binding onto the top. From this part, I learned that I need to place the holes much closer to the edge of the upper, preferably at an angle because the top of the upper isn’t going to fold over easily.
The center tab is held on by the edge binding. My binding and stitching is clearly a lot clumsier than the inspiration shoes, but since this is the first shoe I’ve ever made, I’m pretty pleased with how well it turned out and how much I learned.
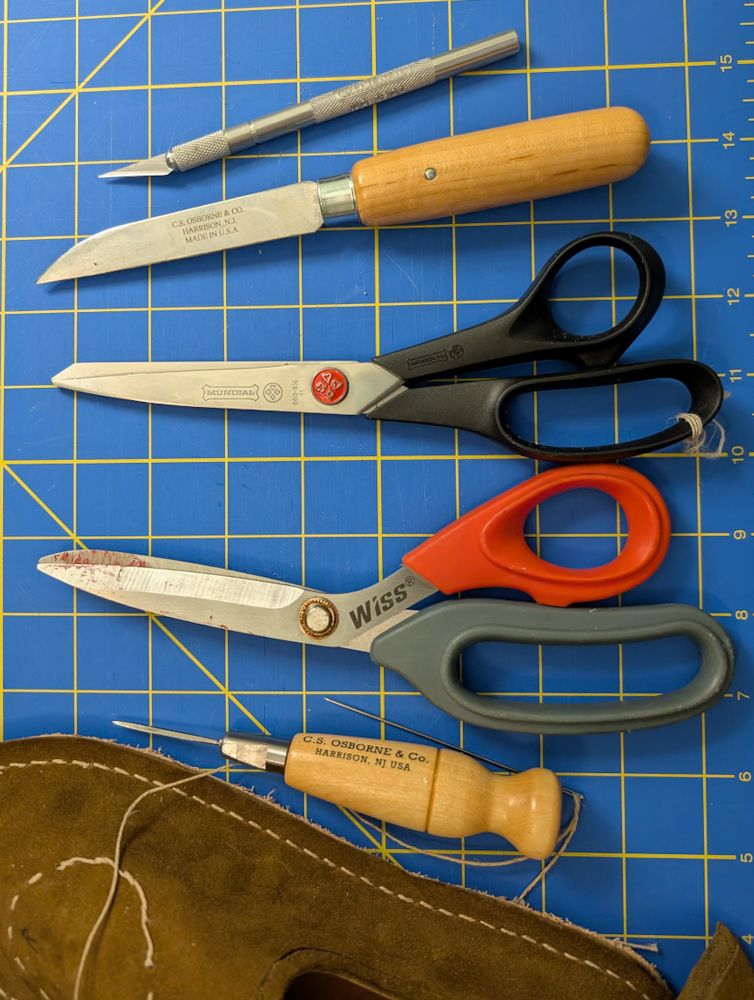
Curtain call for the MVPs of the project (my cutting and sewing tools)… couldn’t have done it without them!