
This post is part of a series about a late antique Egyptian-style tunic project, starting with this overview of the tunic and going into the details about several aspects of the tunic in their own posts. Text references are listed at the bottom of this post; extant artifacts are linked directly to museum catalog pages in their captions.
One of the elements I wanted to incorporate into my tunic was a wool fringe at the bottom hem. It is both decorative and gives some weight to the fabric to help it drape more effectively. Extant examples I had found at the time included these:
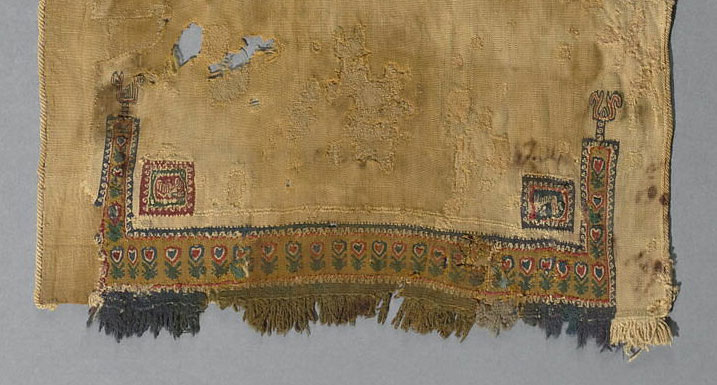
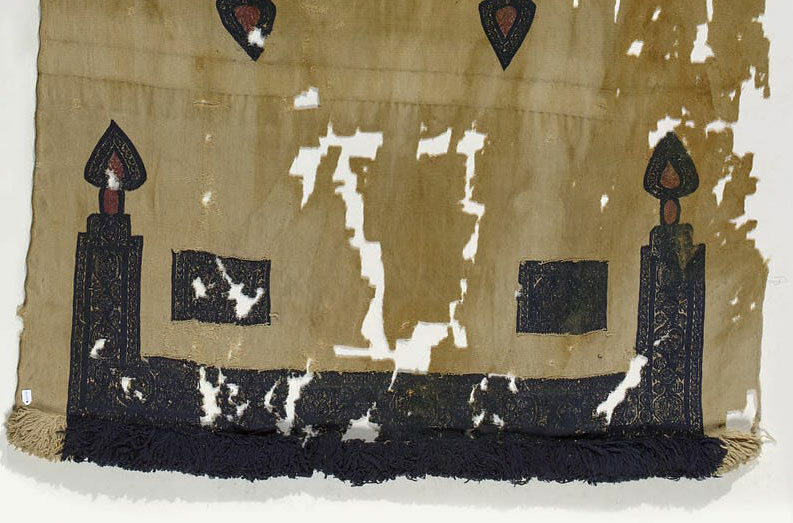
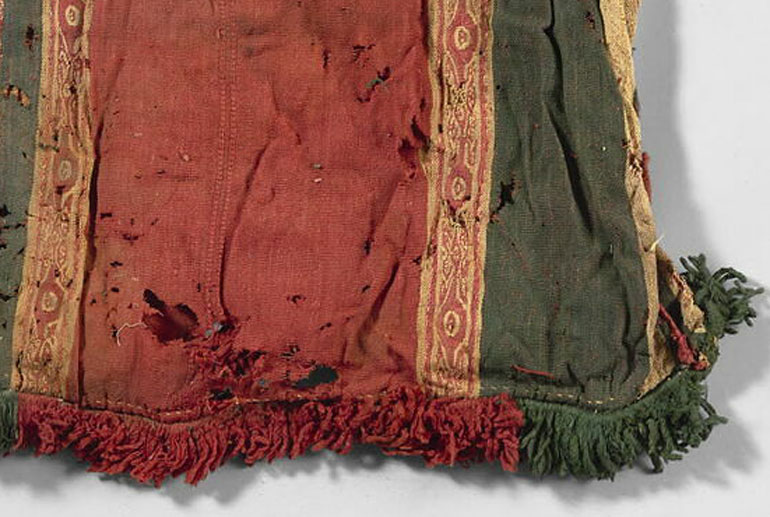
Based on these examples, I decided to try to mimic a fringed selvedge edge and incorporate loops to stick out and become the fringe. At the time, I did not have any good closeup photos or diagrams showing exactly how this fringe was executed, so I experimented. I also needed to come up with something that would not be extremely time consuming to produce, as I only had two months to put the whole garment together.
The Plan
I planned to use three colors of yarn to make a fringe band with stripes of varying widths that would compliment the decoration applied to the bottom of the tunic skirt. (This decoration is still forthcoming at the time of this post. I did not have time to finish embroidering all of the ornamentation before the event I needed to wear this to.) The red parts of the sketch below the skirt ornamentation intended for the tunic:

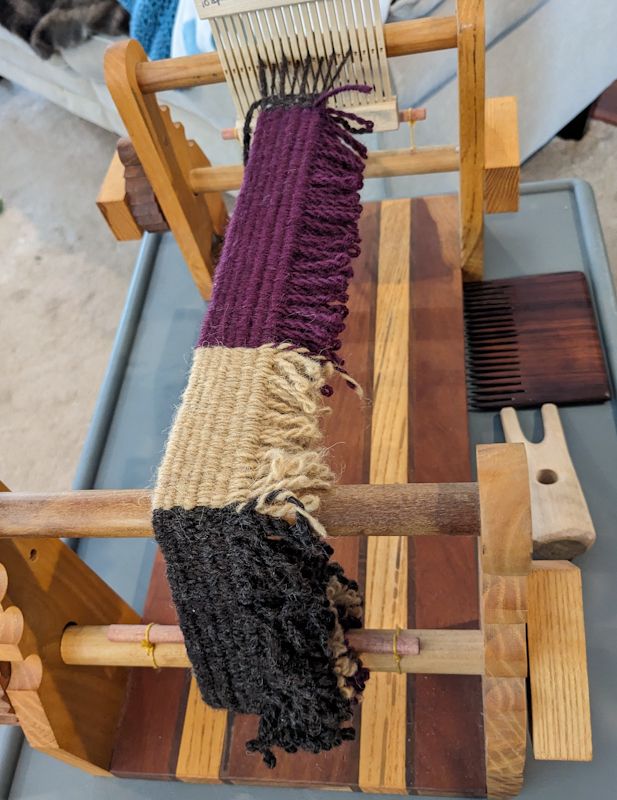
After measuring the bottom of the tunic and the width of the intended skirt decoration, my plan was to weave two fringed bands composed of 5 inches of burgundy, 2 inches of tan, 27 inches of dark brown to match the width of the dark colored decoration, 2 more inches of tan, and 5 more inches of burgundy.
Then I would finish the bands with a light fulling treatment and sew them onto the hem. There is an example of sewn-on fringe in Kwaspen, Figure 6 at page 64 discussed under “The hem.” The same tunic is the third extant example pictured above.
Weaving the Band
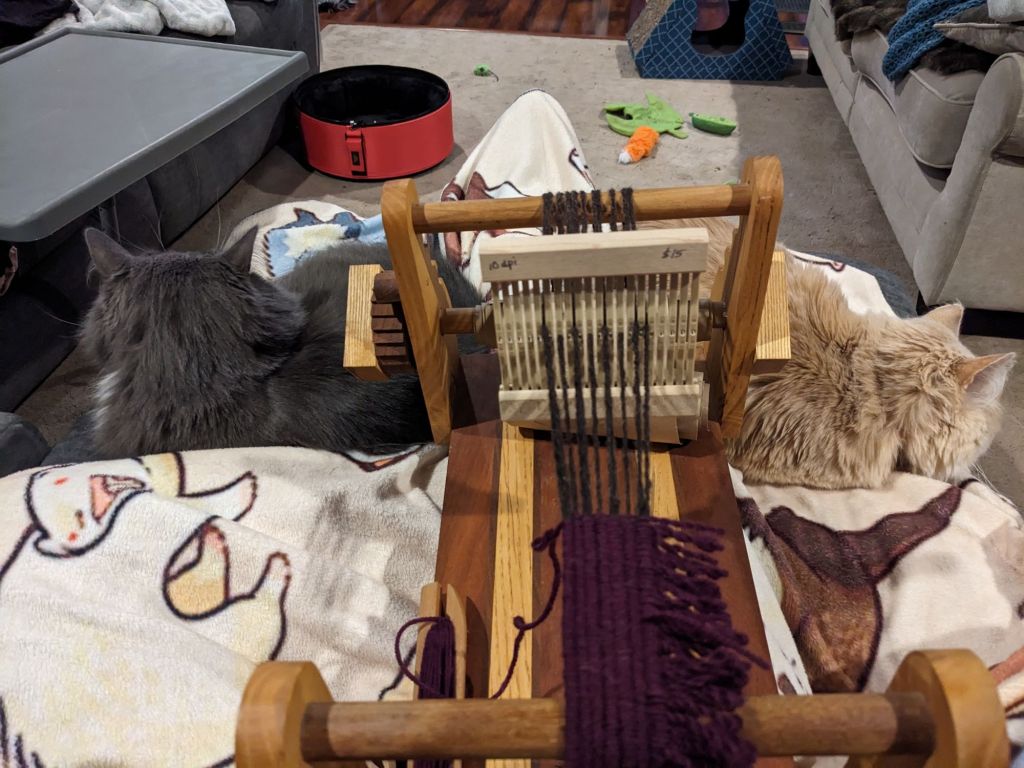
I pulled out my little band loom and warped it up with some strong, dark brown handspun from a fleece I had previously washed, prepared, and spun. I also used this same handspun for the dark part of the weft. In addition, I chose two commercial yarns already in my stash: a multi-ply burgundy color and a single-ply tan color.
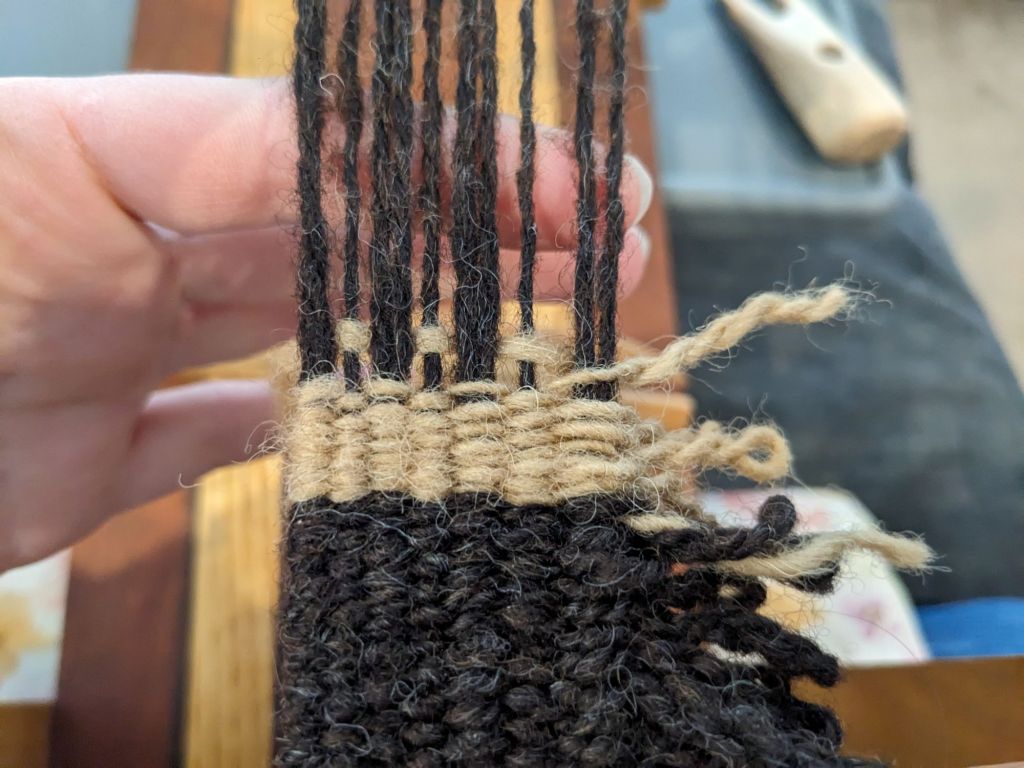
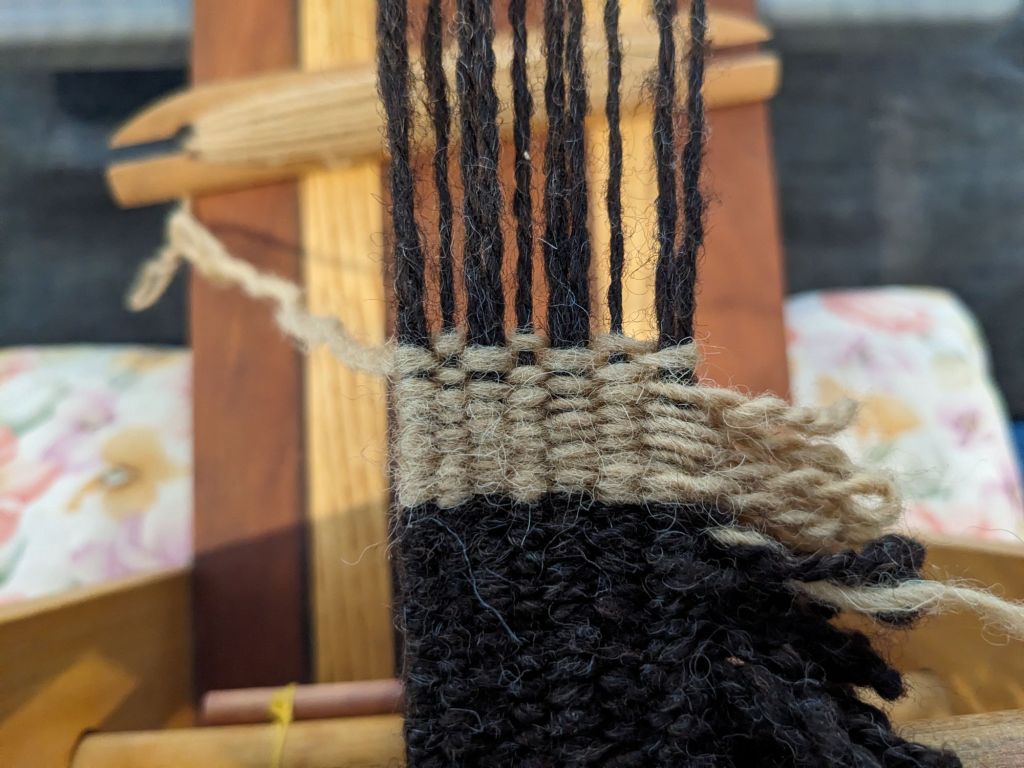
After tying one side onto the apron bar, I threaded my warp through a small rigid heddle to use as a spacing and shedding device; it was small enough with few enough warp threads that I could simply lift and lower it and hold it in place while putting my shuttle through the shed with my other hand. I doubled every second warp so that I would have a series of thick-and-thin rows on the woven band. I split the final pair on the right side into two heddle slots to help maintain spacing on the side where I would be creating fringe.

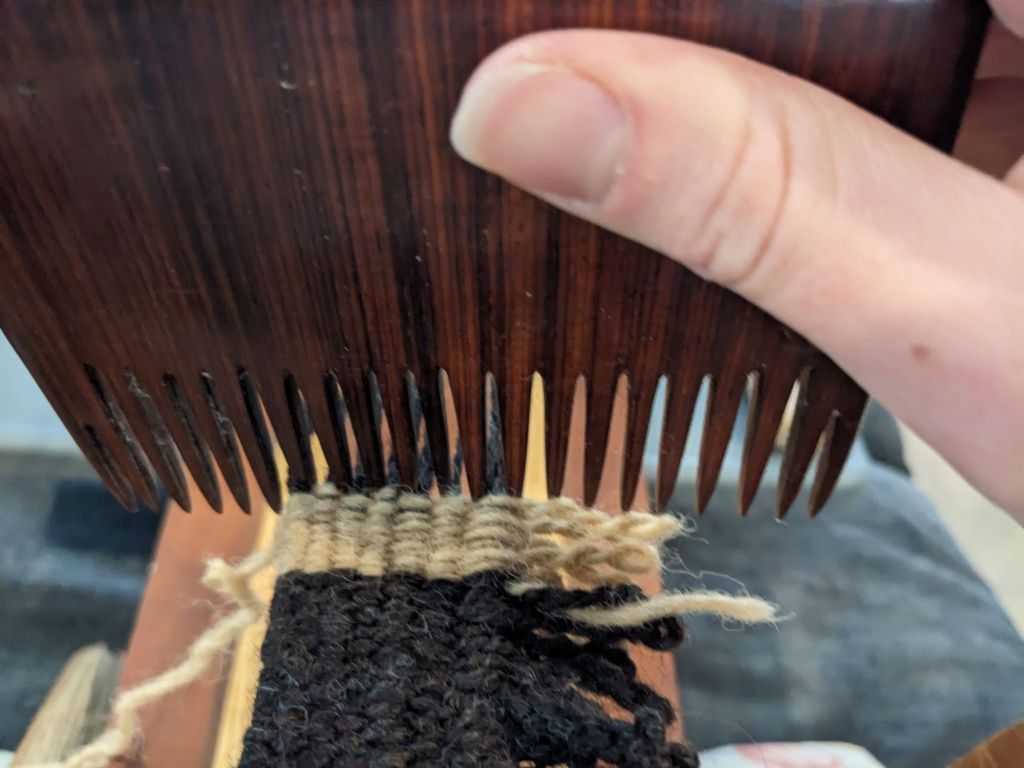
As I wove, I kept the warp taught and let the weft stay looser so that it would compact well and fully cover the warp. I used my wooden comb to compact the weft periodically.
To create the fringe loops, I held out extra weft on the right side of the band when passing the shuttle back through the warp to the left side. Then I added twist to the held section, tightened the weft around a loop sizing gauge (my lucet), and folded the yarn back onto itself to get the yarn to twist around itself. This resulted in twisted warp loops on the right side of the band as I was weaving.
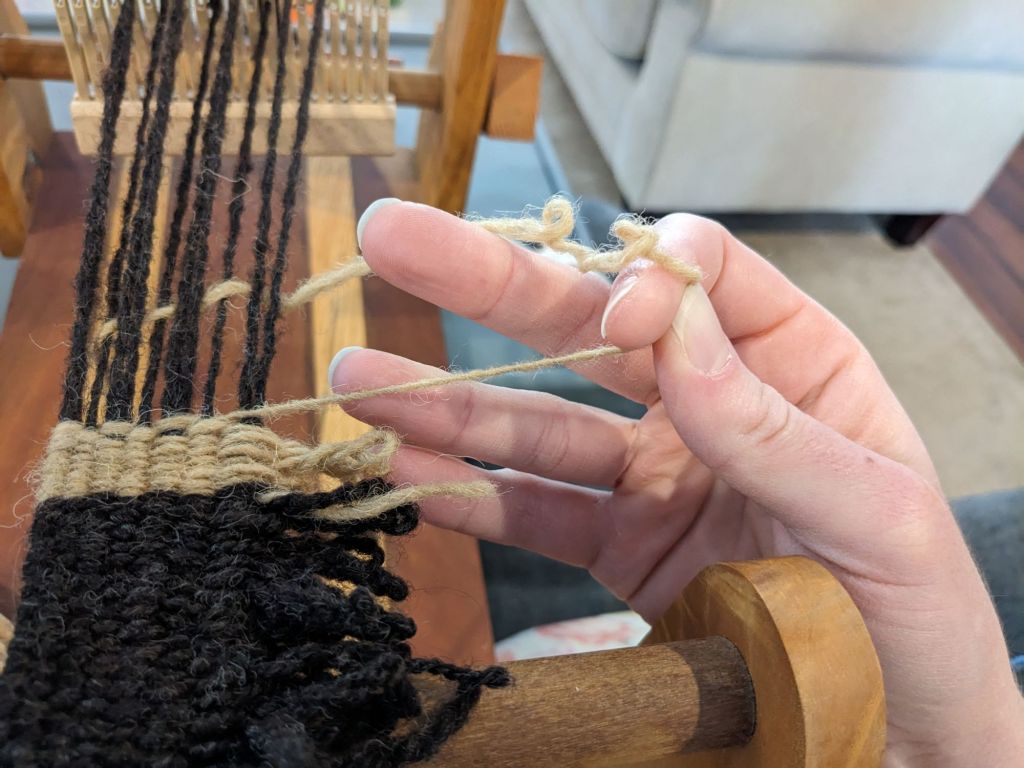

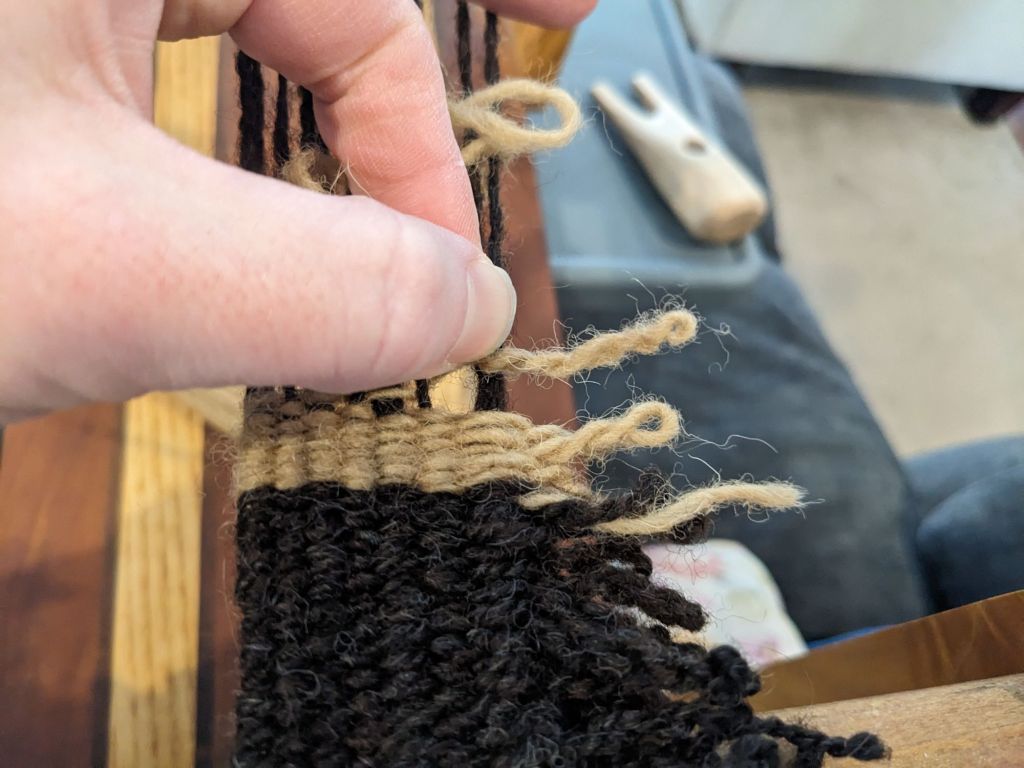
This method does have one drawback: without some way to keep the right-side warp threads in line with the rest of the band, those threads will push outward into the twisted loops. My solution to this issue was to periodically weave a pick without making the loop, aiming for every ten rows or so. This adjustment was able to keep the warp on that edge from migrating outward into the fringe.
I got into the rhythm of weaving and sort of stopped paying great attention at a few points… so I ended up with one band of proper measurements and one where the stripes are a little wonky and may not match up super well to the decoration. But hey, wonky match-up is seen in period examples, too! (See Kwaspen, 64 “The hem”).
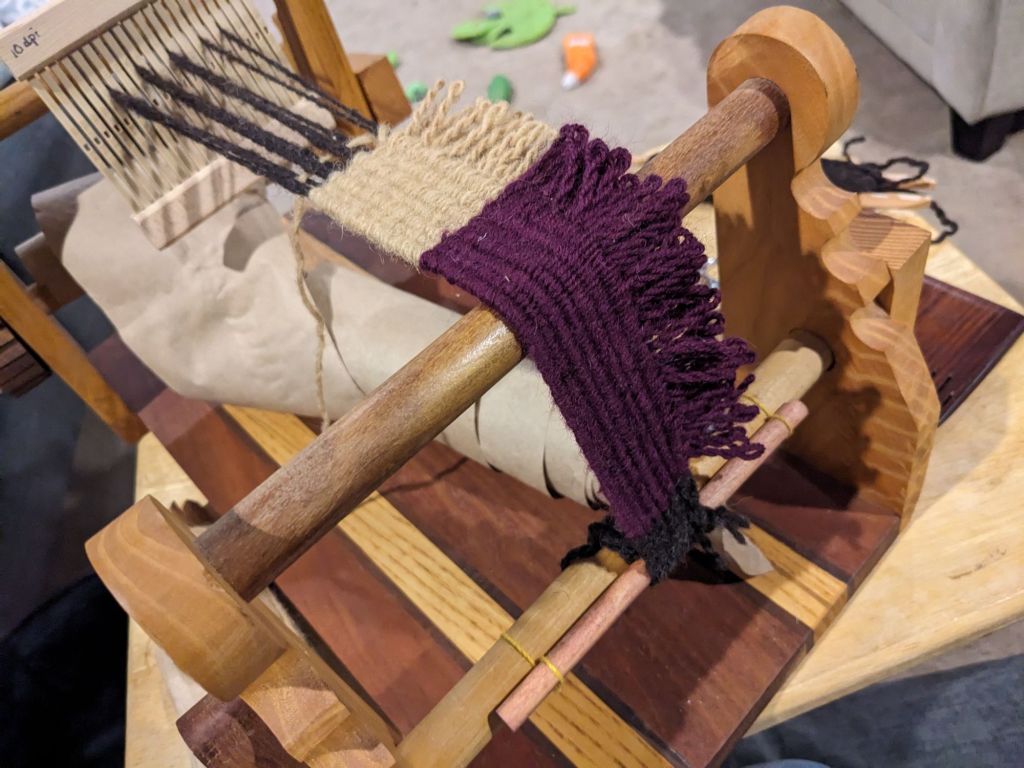
After each band was finished, I cut the warps off the loom and braided them so I would have plenty of length to weave in later once I figured out how I was going to finish it. (The braided ends are simply sticthed to the back of the tunic fabric for now.) When both bands were off the loom, I wet them in cool water and then plunged them into a basin of hot water and manually agitated them for a short while to get a bit of fulling that would help hold the yarn together and set the fringe twist. After rolling them up in a towel and giving the bed a few good thwacks with the towel roll, I hung the bands up to dry completely before sewing them on to the tunic hem.

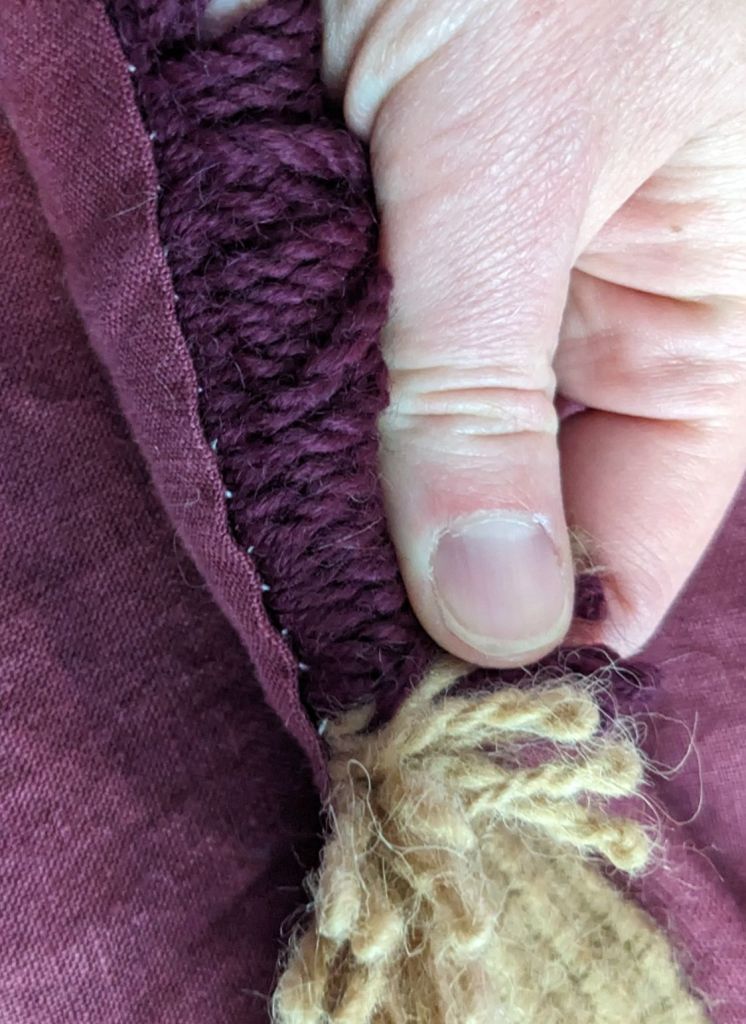
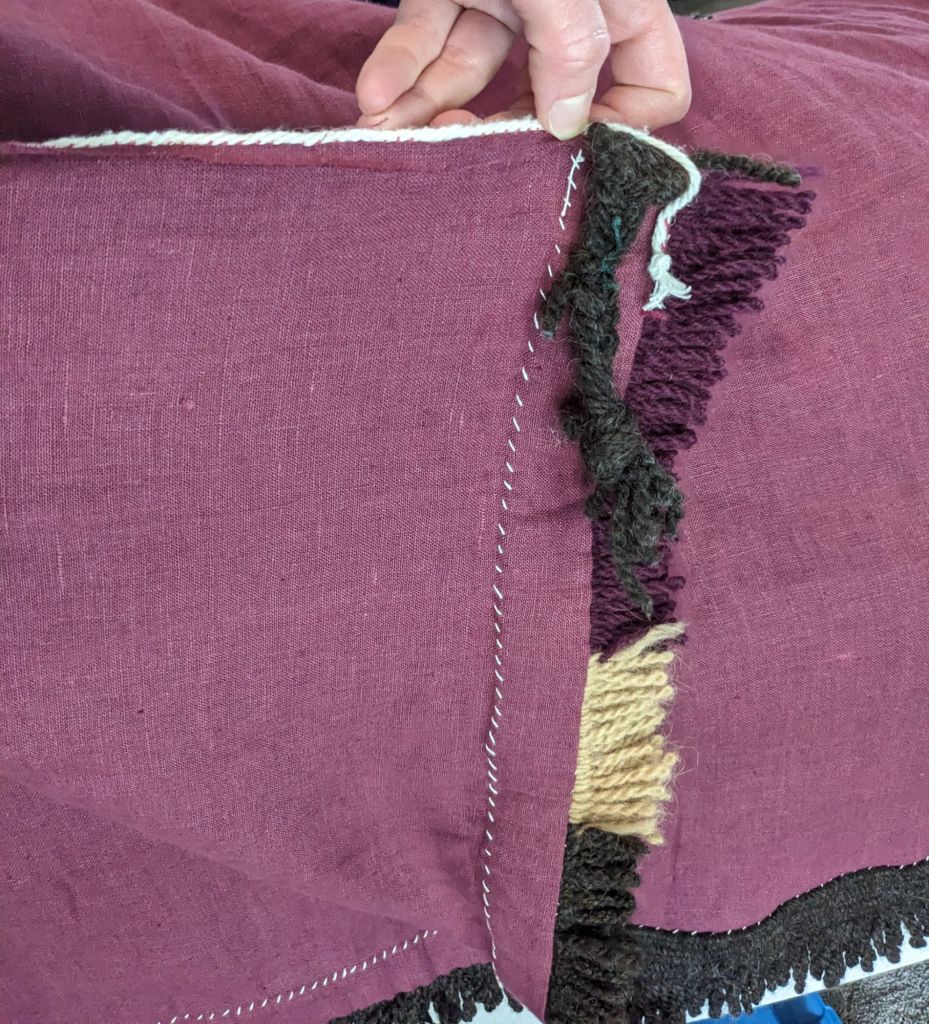
When the fringe bands were dry, I was ready to sew them onto the hem. I folded a bit of fabric up on the outer side of the tunic at the hem, about the same height as the woven band portion of the fringe I then positioned the band on the inner side of the tunic, with the fringe facing upward and the non-fringed side of the band extending a little bit below the bottom edge fold I had just created. I pinned the fringe into place and whip stitched the folded edge of the linen fabric to the back of the band where it was pinned. Then I used a sturdy linen weaving thread to stitch the fringed edge of the woven band to the fabric without showing any thread on the face of the fringe (Photo A below shows these stitches). This is possible because the tapestry weave technique results in a fabric that has multiple layers of threads, so you can pick pick up just one layer and stay invisible.

After that, I folded the bottom of the tunic outward again at the line of stitches I had just made, enclosing the raw edge inside the second fold and turning the fringe to the outer side of the garment. This resulted in the fringed edge of the band now facing down. At this point, I was able to use my sturdy linen thread to whip stitch the non-fringed edge of the band to the outer face of the tunic fabric, securing the fringe in its final position (Photo B above).
The final step was to press the whole hem area with a steamy iron to help the fibers relax into place and give a more uniform appearance. At this point, here is what the inside of the tunic hem looks like:
Lessons Learned
This method was quick and did make a nice fringe. However, it is not as full as most of my examples. Since I made this fringe, I have found more detailed photos of weft selvedge fringe that show what looks like a looped pile woven into the selvedge. (e.g. Fuller, Coptic Woollen tunic hem details, and the Hood of this Child’s Tunic at the Met) This technique creates several rows of loops across the hem instead of just having one row, resulting in a fuller, fluffier fringe.
I will be experimenting with ways to create sew-on fringes with looped pile methods. However, I am quite pleased with how this first attempt came out! The weight it adds to the hem helps give the lighter fabric of the tunic an elegant drape, and it looks good and held up well to being worn.
References:
1. Kwaspen, Anne. “Reconstruction of a deconstructed tunic.” Published in Maria Mossakowska-Gaubert, ed., Egyptian Textiles and Their Production: ‘Word’ and ‘Object,’ (Hellenistic, Roman and Byzantine Periods) 2020. https://digitalcommons.unl.edu/zeabook/86.
2. Fuller, Michael J. “Coptic Textile in the Danish National Museum in Copenhagen.” The Fuller Virtual Museum of Medieval Archaeology, November 12, 2008. https://users.stlcc.edu/mfuller/coptictextileCopenhagen.html.
