
This post is part of a series about a late antique Egyptian-style tunic project, starting with this overview of the tunic and going into the details about several aspects of the tunic in their own posts. Text references are listed at the bottom of this post; extant artifacts are linked directly to museum catalog pages in their captions.
Clavi, sometimes called shoulder bands, are vertical woven bands running either the full length or a partial length of the tunic. They typically run over the shoulder area and extend across both the front and back of the tunic symmetrically. In this time period and place, clavi had evolved into decorative elements rather than strictly being designators of rank and occupation. There are examples of clavi (other woven ornamentation) woven directly into the fabric of tunics as well as those woven separately as individual bands and sewn on. (Mossakowska-Gaubert, 183). I chose to create bands to sew on because my tunic fabric was already woven.
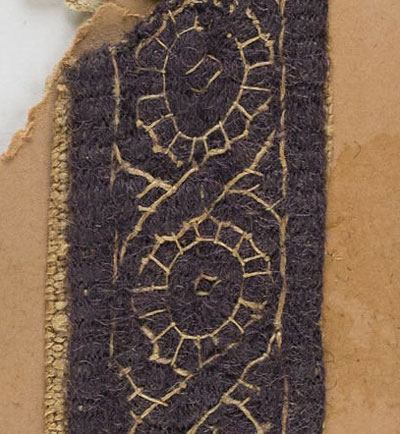
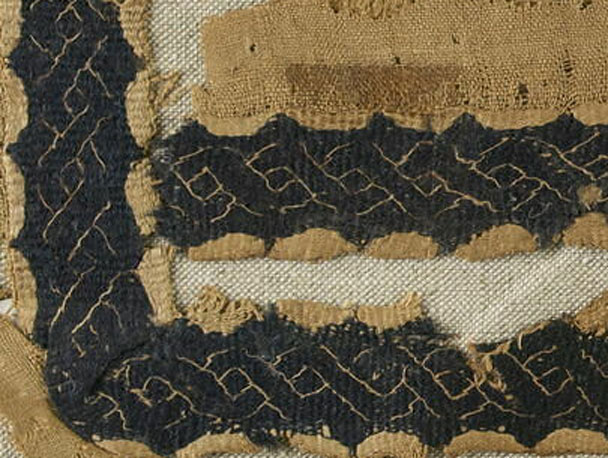
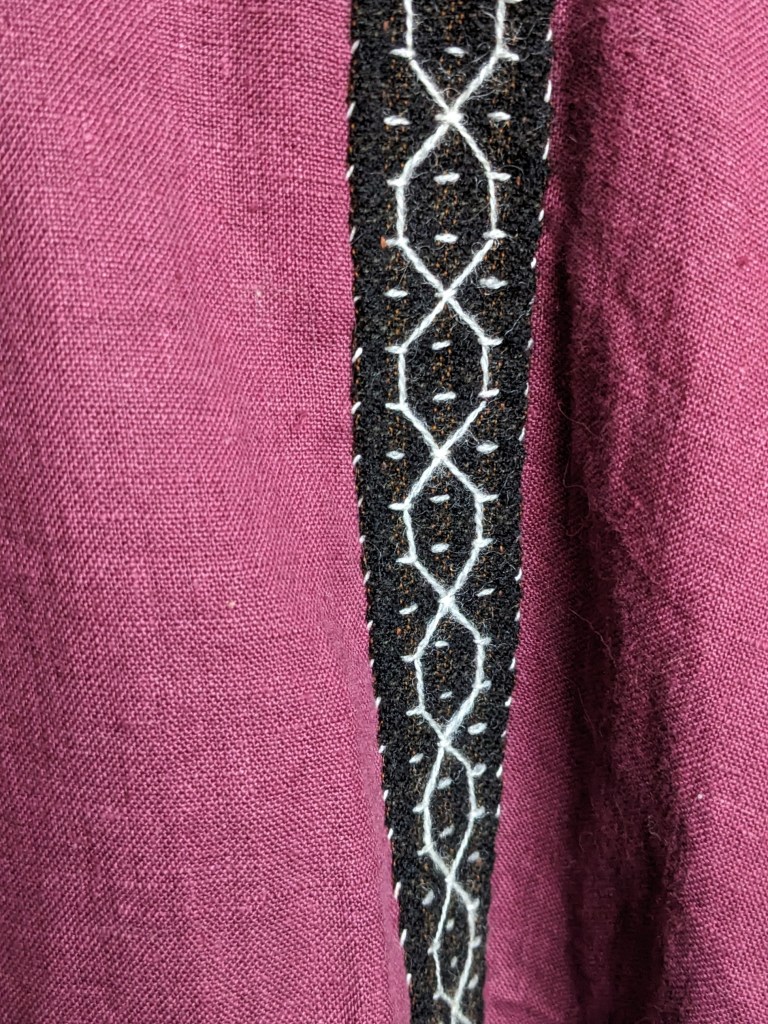
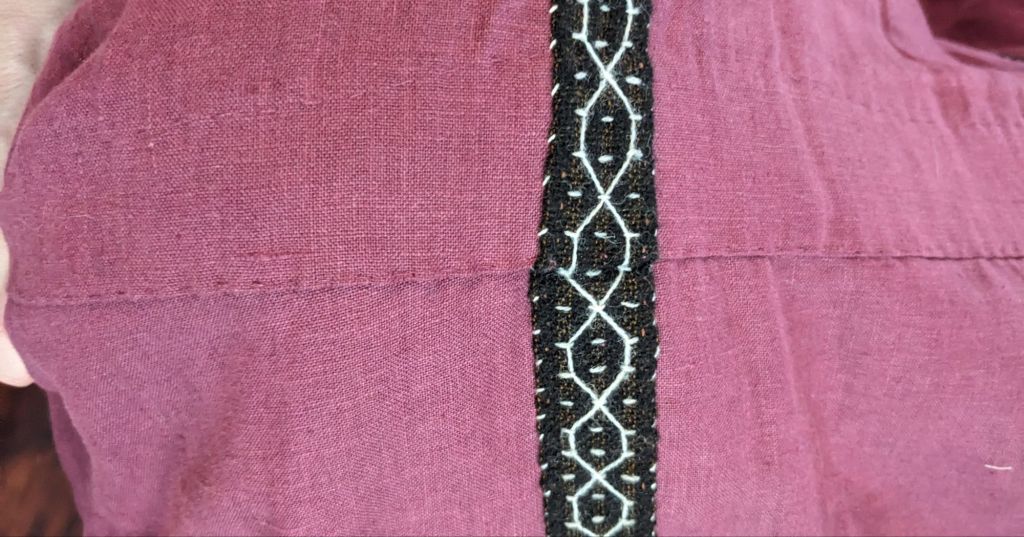
There are several different styles of clavi, ranging from plain stripes of a single color to full color, bordered tapestries of tiny figures enacting scenes. I wanted a style that I could evoke either with trim I already had or with relatively simple embroidery. I did not have any trim that looked good for this purpose, but I did have a very subtly striped dark colored wool fabric and fine, white wool weaving yarn. As a result, the style I chose is a tapestry technique commonly called “flying thread” where a supplemental weft is woven in and carried across the top of the fabric to make single-color linework designs. (Rooijakkers, 181; and see, e.g. South and Kwaspen, 492 Figure 6;).
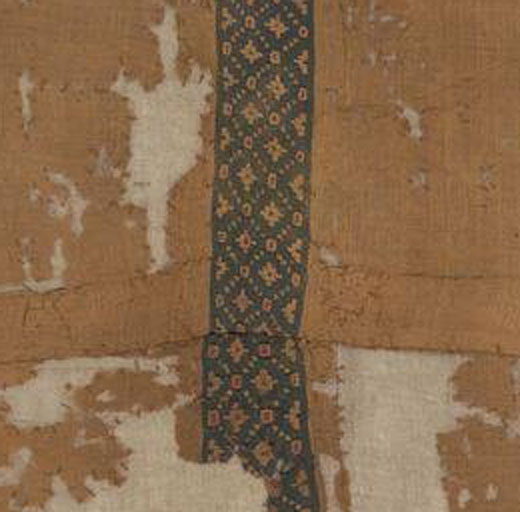
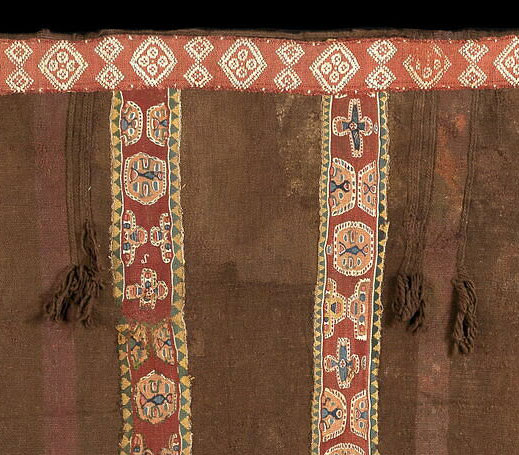
Extant examples of the flying thread technique:


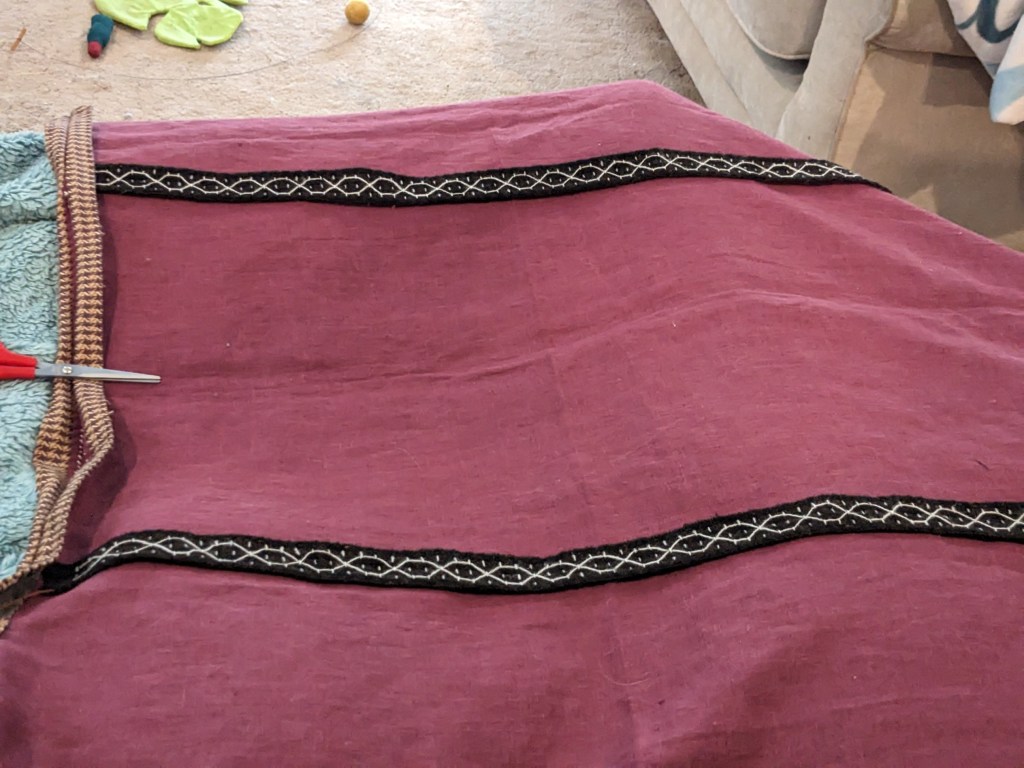
To get this look, I sewed lines of running stitch along the “cut” lines where I would be cutting my fabric into four individual strips to become the bands. Then I decorated my clavi fabric in two stages: First, I used the wool yarn to make a series of evenly placed running stitches going all the way across the fabric parallel to the cut lines. This allowed me to progress quickly while minimizing the number of times I had to turn the fabric.
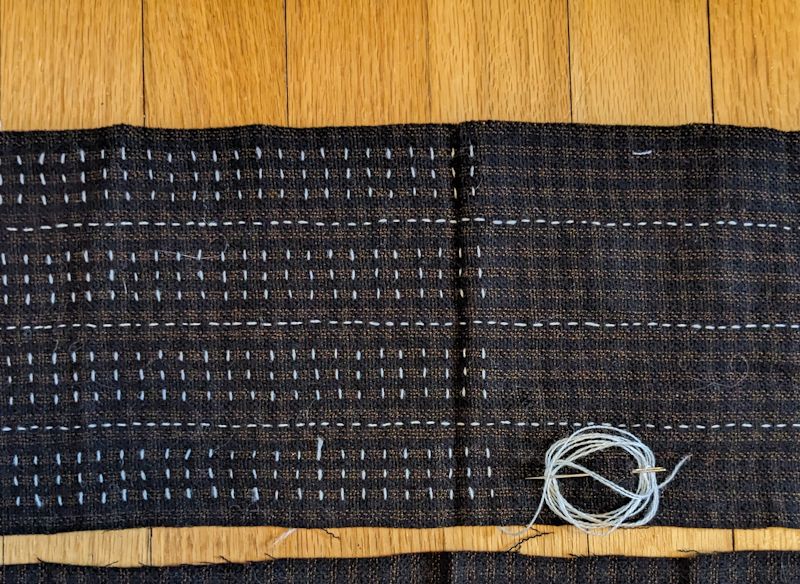
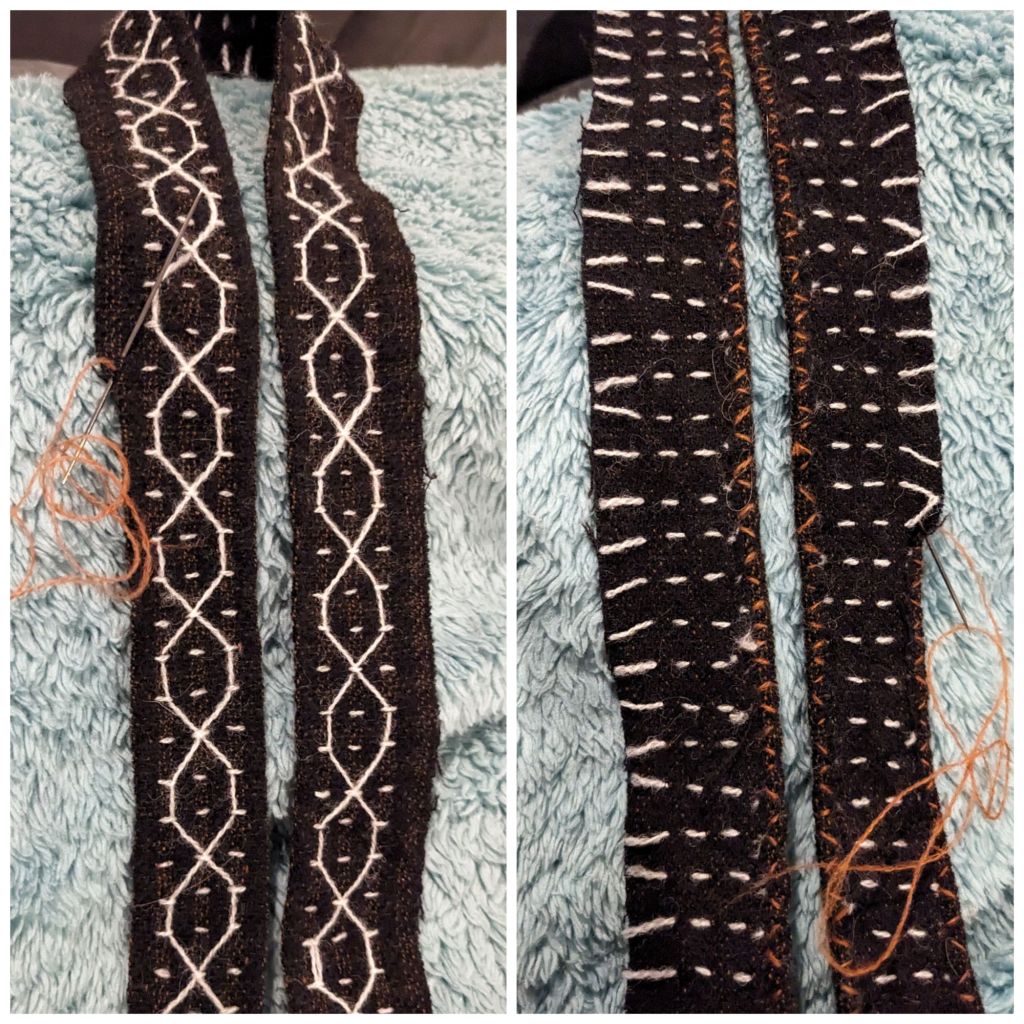
Second, on the “right side” of the fabric (what will show on the finished tunic), I threaded the wool yarn through the running stitches to create a repeating geometric pattern over the surface of the fabric. Initially I thought I would try to make a helix design like the one pictured below:
Unfortunately, there was no way to do that without stitching through the fabric and carrying the thread behind the fabric, which messed up the tension and made the design look uneven. Eventually I settled for the look of single, fine lines spiraling around each other rather than thick lines bordered by the stitching outlines.
Once that was complete for all four stripes, I agitated the decorated fabric in a tub of hot water by hand to full the wool a bit and give the thread a bit of adhesion to the background fabric. This was important, as I would be cutting the strips apart in a direction that would cross the lines of running stitch holding the surface design in place.
After letting the fabric dry completely, I cut the fabric into strips along the “cut” lines and folded the edges of each strip to the underside, tacking them down with a bronze colored weaving wool that matched the subtle copper of threads in the ground fabric. This helped to further secure the loose ends of the running stitch lines.
Once the edges were secured, they were ready to sew onto the tunic. One of the tips I found was to get all of the embellishment sewn on first before sewing up the sides of the tunic (Anna’s New Rome), so I did that for everything going on before the first event it was worn to.
It was definitely much easier to get the strips pinned on in a straight line and stitch them down when I could simply lay the whole tunic out flat for pinning and then had easy access from the sides while sewing. A+ advice there! I used the same sturdy line linen weaving thread to sew the clavi onto the tunic that I used for the structural seams.
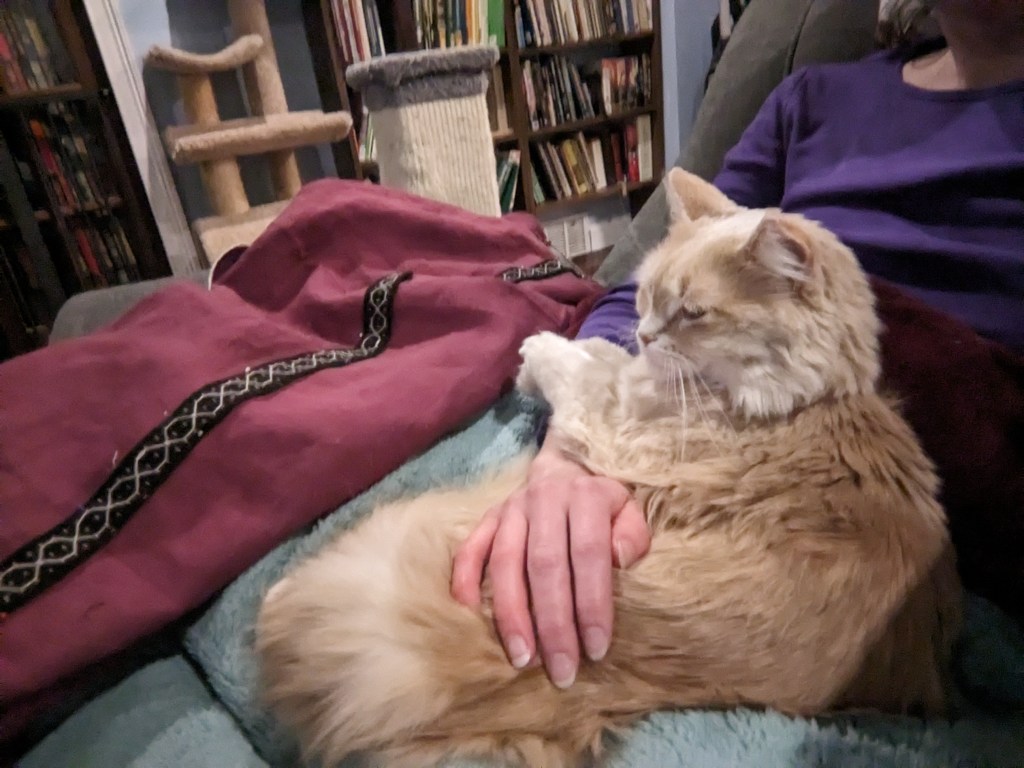
A widely spaced running stitch was an accurate option, but I wanted to keep the folded edges from unfolding, so I chose to use a more closely spaced whip stich (also an accurate option).
Position and fitting details
My clavi do not reach the bottom of the tunic because I simply didn’t have enough fabric in the right configuration to execute strips that long. I ended them with points instead. However, they are long enough that they pass the waist tuck (see Base Fabric and Fitting post), so I had to decide whether to sew them on before or after the tucking happened. There are examples of both, but ultimately it would be easier to pop out the tuck stitches and re-fit the tunic if the clavi were sewn onto the fabric first and folded along with the rest.
The most common shoulder arrangement I have seen for clavi is for them to continue uninterrupted over the should and down the other side. Due to fabric size constraints, I had to make four bands instead of two. This meant they would not be able to continue uninterrupted over the shoulder. At the very least, there would be a seam.
After browsing some extant tunics, I found my solution. I already knew I was going to be edging the neckline with another type of fabric band. I could simply run that band over the top of the clavi as shown on this extant piece

Completion of remaining decoration
I have another chunk of the same ground fabric that I used for the clavi, which I plan to use to make matching elements for the bottom of the skirt. I did not have time to finish all of the pieces before the event I needed the tunic for, so I prioritized the pieces that would be the most difficult to sew on to an assembled tunic and decided to do the rest later. I also plan to weave square pieces (tabulae) to decorate the shoulders. Eventually, the pieces sketched here in red will be added to the design.

References:
1. South, Kristin, and Anne Kwaspen. “The Tunics of Fag El-Gamus. A Survey of Types.” Proceedings of Purpureae Vestes VII. Redefining Textile Handcraft Structures, Tools and Production Processes, January 1, 2021. https://www.academia.edu/57096151/The_tunics_of_Fag_el_Gamus_A_survey_of_types.
2. Rooijakkers, Tineke. “New Styles, New Fashions: Dress in Early Byzantine and Islamic Egypt (5th-8th Centuries).” New Themes, New Styles in the Eastern Mediterranean: Christian, Jewish, and Islamic Encounters (5th-8th Centuries), January 1, 2017. https://www.academia.edu/9112805/New_Styles_New_Fashions_Dress_in_Early_Byzantine_and_Islamic_Egypt_5th_8th_Centuries_.
3. Mossakowska-Gaubert, Maria. “Tunics Worn in Egypt in Roman and Byzantine Times: The Greek Vocabulary.” Textile Terminologies from the Orient to the Mediterranean and Europe, 1000 BC to 1000 AD, January 1, 2017. https://digitalcommons.unl.edu/texterm/20.
4. “Byzantine Patterns! THEY ARE HERE!” Anna’s New Rome (blog), January 4, 2014. https://annasrome.com/2014/01/03/byzantine-patterns-they-are-here/.
